How To Apply Nail Decals Perfectly – Step-By-Step Tutorial
Master the art of decaling in a matter of minutes with some patience and practice
 Gabrielle RichensSkin Therapist
 Gabrielle Richens spent 20 years as a model with Elite Model Management. She is now a skin therapist, clean beauty blogger, and founder of The Rich Skin Club, an online anti-aging coaching service. She helps women understand the aging proce... more
 jyotsana raoBE
 Jyotsana Rao is an engineering graduate from NIT, Nagpur, who discovered her love for writing during her undergraduate days. She is passionate about writing about everything related to beauty - makeup... more
 madhumati chowdhuryMA (English Literature) Experience: 7 years
Madhumati is an associate editor with seven years of professional experience. She has previously worked as an editor, proofreader, and a writer with various organizations, helping her navigate through... more
 vaishali sinhaMA (Comparative Literature) Experience: 5 years
Vaishali Sinha is a beauty and lifestyle writer with five years of experience in writing for various genres. She has a master’s degree in Comparative Literature from Jadavpur University. She combines ... more

Image: Shutterstock
Manicures and nail polish are two methods to liven up your fingernails. Nail art decals or stickers, on the other hand, can be used to decorate nails, especially for unique and different aesthetics and to accentuate the beauty of your nails. Curious to learn how to apply decals to your nails? We have got you covered.
 Keep In Mind
- Prepare Your Nails: Prepare Your Nails Clean your nails and dry them so decals can adhere properly. You can also apply clear polish before applying decals.
- Use Tweezers: Prepare Your Nails Use a pair of tweezers to apply the soaked decals and gently press to smooth out the bubbles.
- Topcoat: Prepare Your Nails Apply a fast drying topcoat on the decals to seal it and to give it a natural finish. This also prevents peeling.
- Aftercare: Prepare Your Nails Maintain your nails by avoiding exposure to water or any harsh chemicals that can cause the stickers to peel off.
Full nail water decals are a godsend for those girls who love doing nail art but don’t have enough time to paint their nails. With these full nail water decals, they can now enjoy nail arts.
In This Article
Things Required:
- A glass of water
- Tweezers
- Fast-drying top coat
- Full nail water slide stickers/decals
 Quick Tip
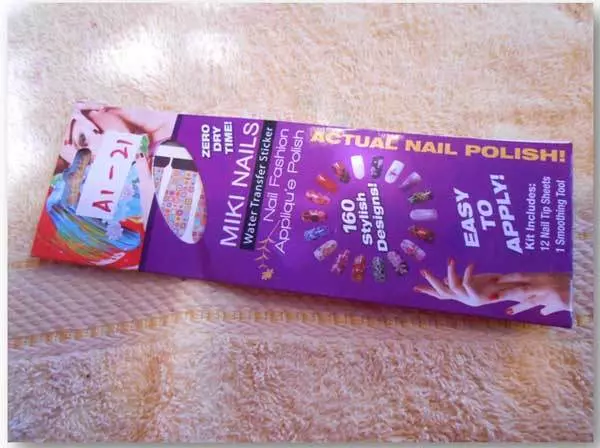
What Does This Packet Contain?
This packet contains 22 full nail decals and a small emery bord filer for smoothing. The back of this packet has full instructions to use them but still there are small things that you should keep in mind while doing your nails.
Before Tutorial
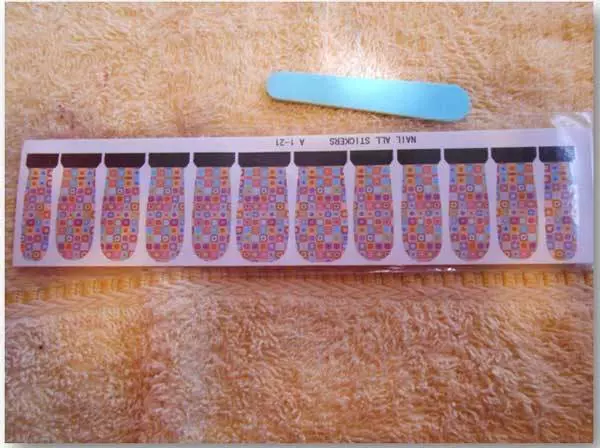
You may want to get a manicure or pedicure done depending on where (fingernails or toenails) you want to try these nail decals. Before starting doing your nails, keep all your things ready – glass of water, nail decals as shown in following pictures:
Stepwise Tutorial
Step 1
First take the decal according to your nail size and trim it if needed.
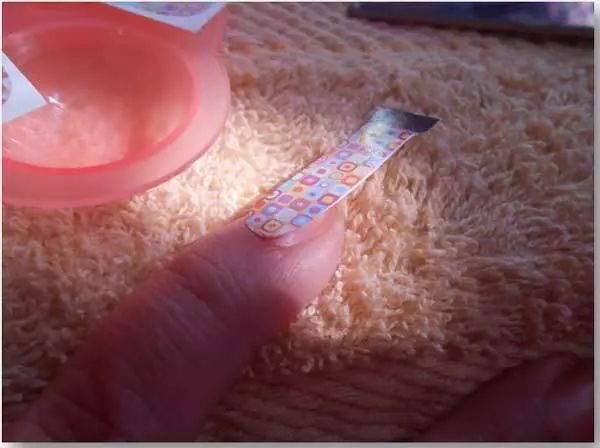
Step 2
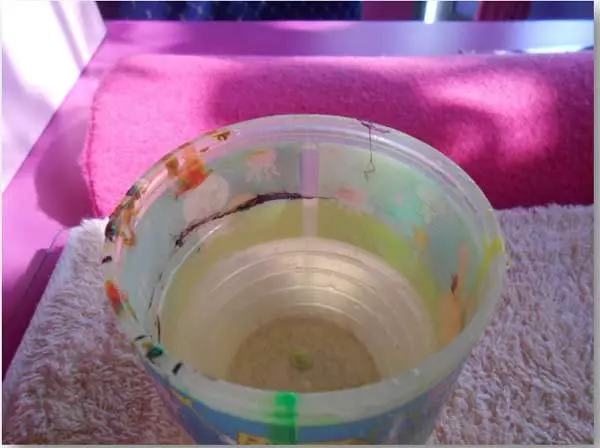
Now take the decals and dip them in a glass of water with help of tweezers as shown in the picture below:

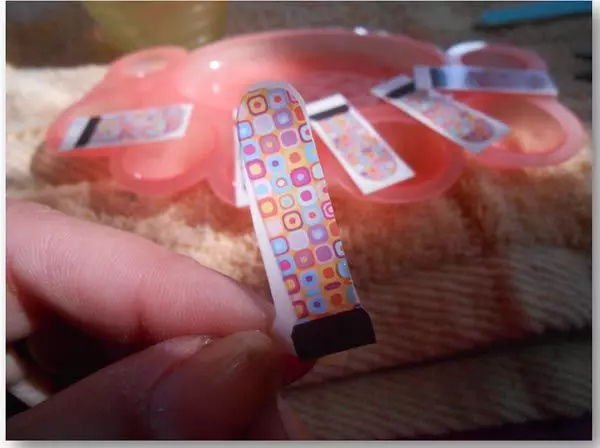
Step 3
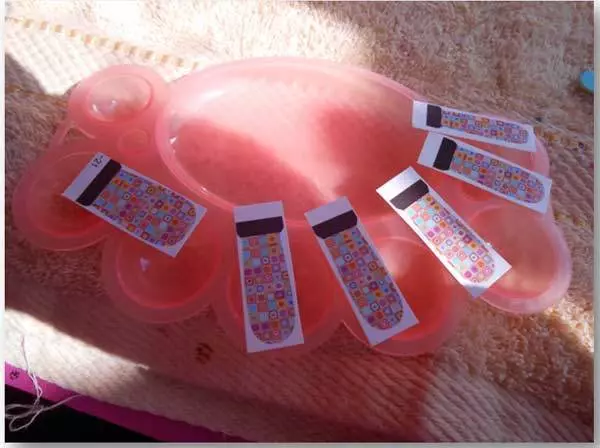
After a few seconds, take that out and it will slide automatically from its backing as shown in the picture below:
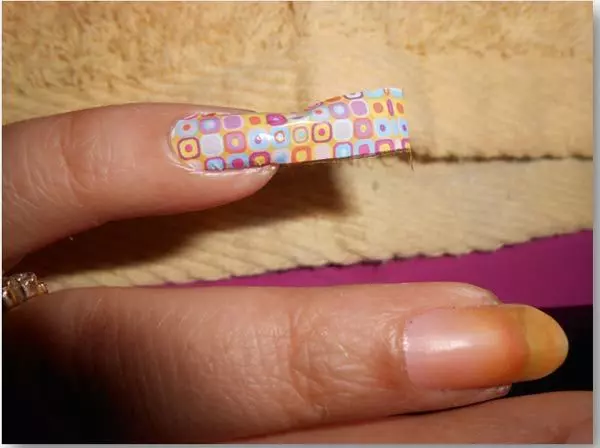
Step 4
Now put the decal on your nail and press them according to its shape as shown in the picture below:
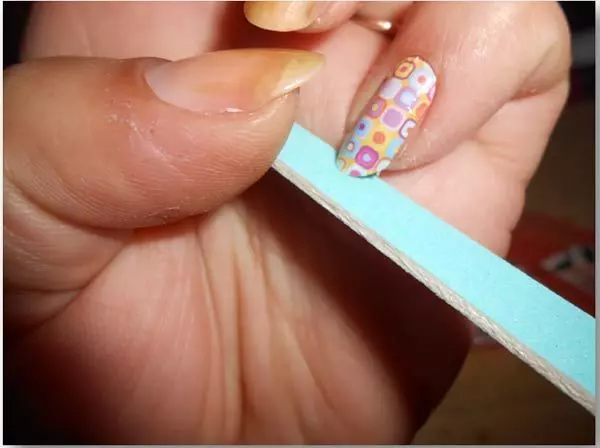
Step 5
Cut the excess and smooth down the decal using the emery board given in the pack as shown in the picture. Wait a while for the adhesive to work, then move towards the next step.
Step 6
Finally, apply a fast-drying top coat, and you are done. But keep one thing in mind that you should be doing one nail at a time. And make sure you don’t move around and transfer the product to your clothes or other things.
Let’s see how full manicure looks:
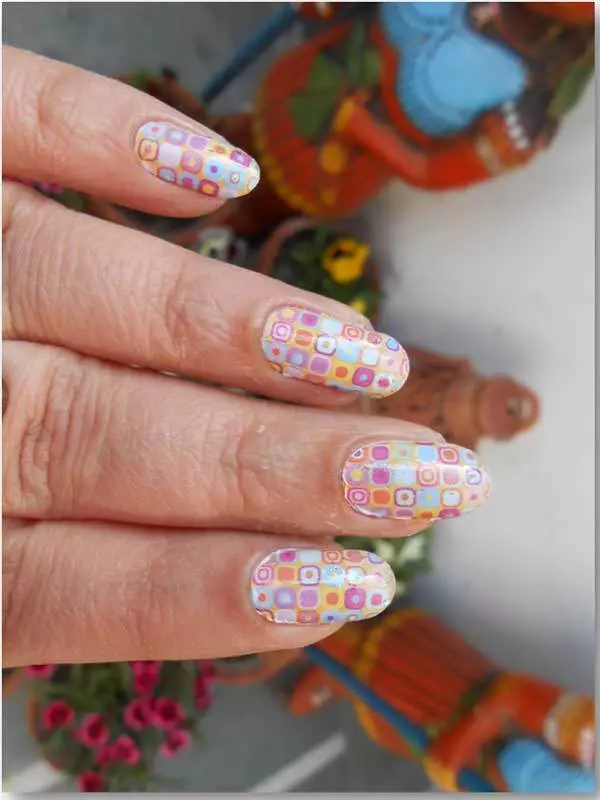
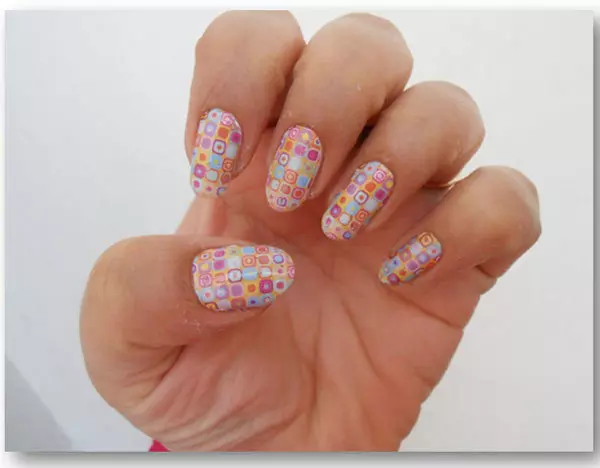
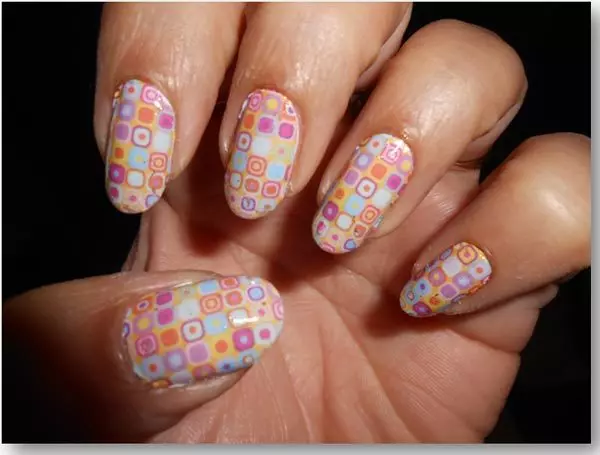
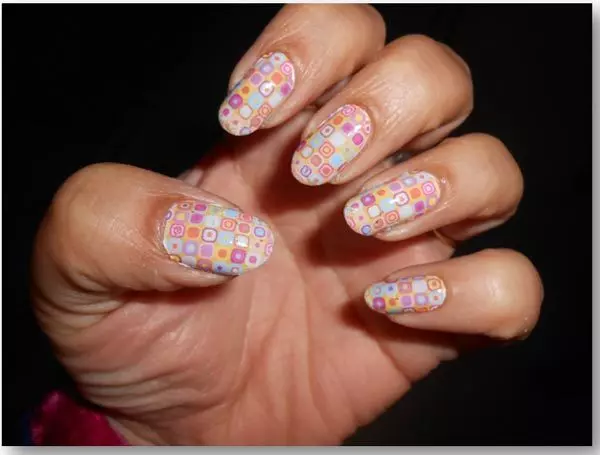
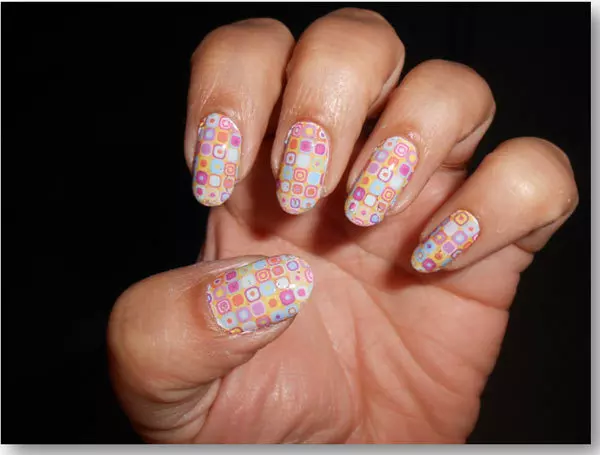
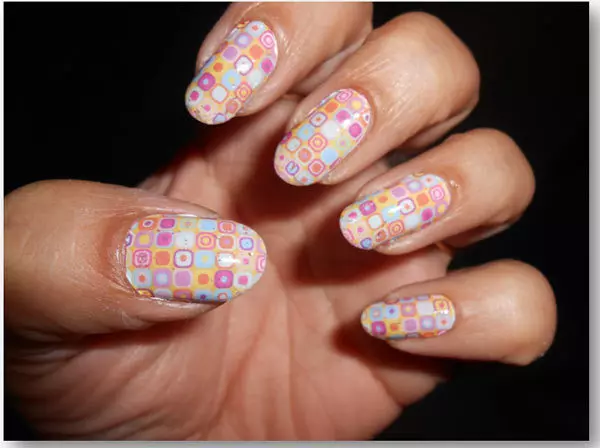
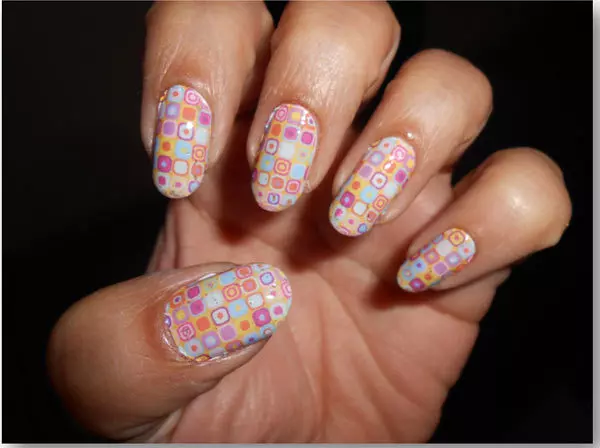
These decals come in many designs, and you can find them online. These are the perfect go to options for DIY nail fashion, with easy application.
Follow the tips and tricks we have given in the tutorial to properly apply nail decals like a pro. You can try a lot of patterns, decorate your nails with embellishment, and let your creativity burst out. You can even go online and look for new trends and follow those styles.
Quick TipLearn how to apply full-wrap water decals to your natural nails! Follow this video for some easy steps to get beautifully designed nails in no time!
Infographic: A Stepwise Tutorial To Apply Nail Decals
Whether you want intricate designs or playful patterns, nail decals offer a convenient solution. In the infographic below, we have highlighted a step-wise tutorial that provides a clear and easy-to-follow process for applying nail decals flawlessly. Check it out!

Illustration: StyleCraze Design Team
Nail decals are perfect for those with a busy schedule. But how to apply nail decals perfectly is a query many have. Nail decals are available in many designs online. You can opt for the ones that suit you and apply them as per the instructions given above. These nail decals save time and are the best way to give your nails a completely new look with minimal effort. Moreover, they are easy to apply and remove, making them suitable for various occasions.
Frequently Asked Questions
Do nail stickers come off in water?
Yes, frequently using water or lotion can disrupt the sticker and make the sticker come off easily.
Do nail stickers damage nails?
It depends. Most nail stickers peel off easily after running nail polish remover over them. However, there are certain nail stickers or nail wraps that are considered safe for your nails. Since you can peel them off after some time, they will not cause any real damage to your nails.
Do nail stickers go on wet or dry nails?
Nail stickers typically go on dry nails. They usually have an adhesive backing that sticks to the nail surface when pressed firmly. Some nail stickers may require a topcoat to seal them in place and prevent them from peeling or chipping. On the other hand, there are water decals that usually go on wet nails. These decals are soaked in water for a few seconds before being applied to the nail surface.
How long do nail decals last?
A. Nail decals last longer depending on factors like the quality of the decals, the nail condition, and the activities one usually performs. Generally, nail decals can last anywhere from a few days to a couple of weeks. Some high-quality decals can last up to 2-3 weeks with proper care.
Can I create my own nail decals at home?
Yes, it is possible to create nail decals at home. There are many creative ways to make one’s nail decals. By using a printer, drawing or painting designs on special decal paper and using adhesive vinyl sheets and a cutting machine, one can create truly unique and personalized nail art.
How do I store my nail decals to ensure their longevity?
Keeping the nail decals in a cool, dry place, using a resealable bag or container to store the nail decals, and keeping them away from heat sources can help ensure the longevity of the nail decals.
What are some common mistakes to avoid when applying nail decals?
One of the most common mistakes one should avoid when applying nail decals is applying nail decals on wet nails. Make sure the hands are dry before applying the decals. Skipping the base coat, not trimming the decals properly to fit the size and shape of the nails before applying them, not smoothing out air bubbles while applying the decals, not using a topcoat after the decal has completely dried and using too much water during the process are some other mistakes that one must avoid to achieve a flawless finish when applying nail decals.
Key Takeaways
- Nail decals can be used to create various kinds of nail art.
- The best way to apply nail decals is to start with a base color and trim the decals to fit your nails.
- An emery board can be used to cut or smoothen excess nail decals and achieve perfection.
- A fast-drying topcoat onto your nails after the decals are adjusted can protect the nail design and give your nails a shiny finish.
- Some nail decals can only be applied over white nail polish.
Image: Dall·E/StyleCraze Design Team