How To Clean Face At Home: 6 Simple Steps You Need To Follow
There is, after all, a method to this seemingly simple process.

Image: Shutterstock
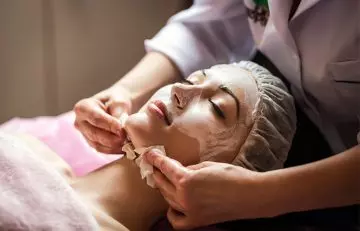
We all know how to clean face at home and are aware of the basic cleanse-rinse-dry formula. While there is nothing wrong with these steps, our skin often needs more than this basic routine to stay healthy. This is where regular facial clean-ups may help.
You do not need to rush to a salon to get a facial clean-up. Instead, you can easily do it at home. Facial clean-up works like a deep cleansing and involves just a few extra steps. This article will help you learn the step-by-step process of facial clean-up. Scroll down.
In This Article
What Is A Face Clean-up?
A face clean-up is not as extensive as a facial. A clean-up involves cleansing the skin thoroughly, exfoliating, steaming, followed by toning and moisturization. A face clean-up helps to remove traces of dirt, makeup, sebum, pollution, and dead skin cells. Regular clean-ups maintain the glow of your skin and keep the skin healthy.
Face cleansing or face clean-up is essential for maintaining proper skin health. However, it is different from facials.
Face Clean-up: How Is It Different From Facials?
A regular face clean-up keeps dirt and impurities away from the skin. It helps to exfoliate dead skin cells, remove excess sebum, and cleanse the skin pores. Do not confuse a face clean-up with the facial that you get done at salons and spas.
Face clean-up is what you do at home using regular products like cleansing oil, cleanser, toner, and exfoliator. You do not need any special products. However, facials are done by experts and involve massaging your face and may also include other special treatments.
You can do a face clean-up regularly at home. It is not necessary to follow all the cleanup steps every day, and you may skip a step or two. This will ensure that your skin is thoroughly cleansed and stays healthy and glowing.
How To Do Face Cleanup At Home: A Step-By-Step Guide
Step 1: Cleanse Your Face
Among the 6 clean-up steps, the first one is a two-step process – first, remove your makeup, and second, cleanse or wash your face.
- Rub an oil-based cream or cleansing oil all over your face. The cleansing oil gets mixed with the natural oils of your skin and dissolves the makeup particles, dust, and dirt that are stuck in the skin pores.
- Take a cotton pad, dip it in water, and wring out the excess. Wipe your face with the wet cotton pad. You may also use an emollient face wipe for this step.
- Take a pea- or dime-sized amount of a gentle cleanser (pick one that is soap- and sulfate-free) and rub it on your face thoroughly.
- Splash your face with lukewarm water and pat it dry.
This is known as double-cleansing. A cleanser alone cannot remove makeup and dirt particles from your face. That is why you need oil cleaning to remove all traces of makeup and impurities.
Kristine, a beauty blogger, shared her experience of doing double cleansing for a week and was amazed with the results. She said, “I noticed that I also did not have as much congested areas (pores?) as before and my skin felt smoother in texture (i).”
Step 2: Exfoliation
The next step is to exfoliate the dead skin cells from your skin. Do not repeat this step every day. Limit it to just once or twice a week. Over-exfoliating can make your skin react and breakout.
There are two ways to do it – use a gentle scrub or an exfoliating acid peel.
To exfoliate with a scrub,
- Wet your face.
- Take a dime-sized amount of any gentle and soap-free scrub.
- Apply it all over your face, except for the delicate skin around your eyes. Massage in a circular motion, focusing on your problem areas (where you get whiteheads or blackheads).
- Do this for five minutes and then wash your face with lukewarm water.
To exfoliate with an acid peel,
- Wet your skin and pat it dry.
- Apply the exfoliating acid peel on your face.
- Leave it on for the duration mentioned by the manufacturer in the instruction booklet. Wet a washcloth and clean your face with it.
Points To Keep In Mind
- Do not use exfoliating peels if you have never used acid on your face before.
- Do a patch test to see if your skin can tolerate the acid.
- Adhere to the instructions provided by the manufacturer.
- Never use acid peels more than twice a week or as mentioned by the manufacturer.
Step 3: Steaming
Steaming the face after exfoliation softens the skin and opens up the pores. This process makes it easy for your skin to absorb the goodness of other skincare products (that you will apply in the following steps), and it also becomes easy to extract blackheads (if you have any). To do this:
- Pour warm water in a bucket or fill a basin with warm water (as per your convenience).
- Add essential oils to the water (if you wish). You may use lemongrass, lavender, peppermint, sandalwood, eucalyptus, or bergamot oils.
- Bend over the steaming water and cover your head with a towel.
- Hold your face over the steam for 10 minutes.
You need not steam your face every day. Do it twice a week.
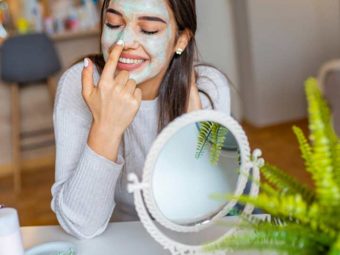
Step 4: Applying A Face Mask Or Face Pack Or Face Solution
After steaming, applying any topical solution lets the ingredients sink deeper into the skin. This way, your skin gets the maximum benefits of the face mask or topical solution.
You may use
A Face Mask Or A Face Pack
- You may use a store-bought face mask or prepare a face mask at home (explained later in this article).
- Apply it generously on your face and let it dry.
- Wipe it with lukewarm water.
Or
A Sheet Mask
- Apply the sheet mask on your face.
- Let it stay for 15-20 minutes (or follow the instructions given by the manufacturer).
- Take it off. Do not wash the product from your face.
- Massage the remaining product all over your face and let your skin absorb it overnight.
Use a face mask or sheet mask thrice a week.
Step 5: Toning
Now that your pores have absorbed all the goodness of the skincare products, it is time to balance the pH levels of your skin. Use a chemical-free and mild toner as per your skin type. You may even use DIY toner on your face.
All you need to do is:
- Spritz the toner generously all over your face.
- Let it dry.
- Do not wash it afterward.
Toning helps the skin stay hydrated and also shrinks the pores. Use a toner every day to keep your skin healthy.
Step 6: Moisturize
This is the final and most relaxing step in the process. Moisturizing helps to keep your face hydrated and also addresses specific skin issues (in case you are using targeted moisturizers and creams). You may use a moisturizing serum or an anti-aging night cream.
Here’s what you need to do:
- Take a pea-sized amount of the serum or cream or lotion. Dot it all over your face and neck.
- Gently massage in a circular motion.
These steps might seem extensive but offer numerous beauty benefits.
Benefits Of A Face Cleanup
- Regular face clean-ups keep your skin free of excess dirt and impurities.
- It ensures that your skin remains refreshed and rejuvenated.
- It keeps the skin pores unclogged and clean. This helps to reduce breakouts and other skin issues.
- Cleaning your face regularly keeps it hydrated and prevents skin issues caused by dryness, such as flakiness and itchiness.
- It brightens your skin and reduces tanning and pigmentation issues.
 Quick Tip
If you have a bunch of skincare products that you swear by, you can use them for cleaning your face at home. However, if you are a DIY freak and love all-natural things, check out the next section!
Ways To Use Natural Ingredients For Face Clean-up: DIY Skin Care Products
1. DIY Cleanser
You Will Need
- 1 cup jojoba, coconut, or sweet almond oil
- 1 tablespoon baking soda
- 5 drops of lemon essential oil
- 5 drops of lavender essential oil
- A glass jar for storing
Method
- Melt the oil (if you are not using coconut oil, skip this step).
- Mix all the ingredients and store the mixture in the bottle.
- Use it to clean your face.
Note: For oily and acne-prone skin, replace the two essential oils with tea tree essential oil.
2. DIY Scrub
You Will Need
- 1 cup of sugar
- ½ cup olive oil
- 5 drops of essential oil of your choice
- A glass jar for storage
Method
- Mix all the ingredients well.
- Store it in the glass jar.
- Use a tablespoon of the product to scrub your face.
3. DIY Face Pack
You Will Need
- 2 tablespoons multani mitti (Fuller’s earth)
- 1 teaspoon rose water (adjust the quantity)
- 1 teaspoon lemon juice (use this only if you have oily skin)
- 1 teaspoon honey
Method
- Mix all the ingredients and make a paste.
- Apply the pack all over the face and let it dry.
- Wash it off.
4. DIY Toner
You Will Need
- 1 grated cucumber
- 5 tablespoons rose water
- Spray bottle
Method
- Squeeze the juice out of the grated cucumber.
- Mix it with the rose water and store the mixture in the spray bottle.
- Shake well before using.
5. DIY Oatmeal Facial Cleanser
You Will Need
- 1 tablespoon of oat flour
- 1 teaspoon of honey
- 1 tablespoon of water
Method
- Mix the honey and oat flour in a bowl.
- Add water for a paste-like consistency.
- Apply the mixture to your damp face and gently massage in a circular motion.
- Let it sit for a few minutes.
- Rinse off with lukewarm water and pat dry.
Note: Use this once or twice a week for best results.
6. DIY Face-Cleansing Grains
You Will Need
- 1 tablespoon of rice powder
- 1 teaspoon of nut (almond or walnut) powder
- 1 teaspoon of milk powder
- 4 to 6 tablespoons of rose water
Method
- Mix all the ingredients in a bowl.
- Add the rosewater for a paste-like consistency.
- Apply the mixture to your face and let it dry completely.
- Use cold water to remove the paste.
Note: Apply this once a week for best results.
There are a few things you need to keep in mind while cleansing your face.
Essential Tips For The Perfect Face Clean-up At Home
- Do Not Forget Your Hairline: You can get acne even on your hairline. Hence, clean your way up to the hairline.
- Do Not Use Hot Water: Hot water can dry your skin, and cold water may not remove dirt properly. Use lukewarm water.
- Be Slow: Do not hurry up while cleaning your face. Take your time to focus on each area of your face and neck. It should be a mini-massage session for your face.
- Choose The Right Cleanser: Not all cleansers suit your skin. Choose one based on your skin type and skin issues.
- Wash Thoroughly: It is important to wash the skin thoroughly after applying cleanser or any other product. Check the hairline, near your eyebrows, and your nose. Rinse thoroughly.
 Quick Tip
Infographic: 6 Easy Steps For A DIY Face Clean-Up
Maintaining a proper skin care routine keeps you looking radiant. While a simplified 6-step skin care routine may sound too good to be true, it is all you need to achieve youthful and clear skin. Check out the infographic below for a quick recap of the steps involved in a skin clean-up process.

Illustration: StyleCraze Design Team
Regular facial clean-ups are a great way of keeping your skin smooth and glowing. It involves the process of deep cleansing, exfoliating, steaming, toning, and moisturizing to get the dirt and grime out of your face. Unlike facials which involve special treatments, facial clean-ups unclog your pores, hydrate the skin, and reduce tanning. The great thing about facial clean-ups is that you can use jojoba oil, cucumber, sugar, or baking soda to make your own cleanser or toner at home. All you need to do is follow the tips on how to clean your face at home and you can say goodbye to those expensive salon visits.
Frequently Asked Questions
Are there any side effects of face clean-up?
No, if you are using the right products and cleaning your face in the proper way, there are no side effects.
Can I steam my face every day?
It is better to do it twice or thrice a week as anything excessive can be bad for the skin.
How often should we do face clean-up?
Regularly. However, you can skip a few steps like exfoliation and steam. Do these steps only twice or thrice a week.
What are the best ways to exfoliate your skin, and how often should this be done for optimal results?
Use scrubs and chemical exfoliators, depending on the skin type, and exfoliate only once or twice a week. While it helps remove dead skin cells and unclog pores, for a brighter, smoother complexion, don’t over-exfoliate as it can lead to irritation and damage.
What are the best tools and techniques for massaging your skin, and how can this improve circulation and enhance the benefits of facial cleansing?
Tools like jade rollers or gua shas are available in the market that help improve blood flow and reduce puffiness of the face.
Other than that, moving the fingertips gently in a circular motion can stimulate and enhance blood flow and let the products seep into the skin. Massaging the face with the correct technique and tools can benefit the skin.
What are the benefits of incorporating facial massages and other skincare practices into your daily routine, and how can this improve the health and appearance of your skin over time?
Regular face massages can enhance skin elasticity, stimulate lymphatic drainage, improve blood circulation, and lessen the appearance of fine lines and wrinkles. A consistent skincare routine is important for maintaining healthy and radiant skin.
Key Takeaways
- Using cleansing oils to deep clean your face helps remove every bit of make-up and dirt from your skin.
- Use a gentle physical scrub as it helps remove dead skin cells but doesn’t strip your natural skin oil.
- Avoid using hot water on your face as it can lead to dryness of skin.
- Always use a toner and moisturizer to balance the pH of your skin and lock in moisture.
- Cleaning your face regularly can help prevent oil-build and reduce tan, blemishes, and fade marks.

Image: Stable Diffusion/StyleCraze Design Team
Discover the ultimate guide to washing your face correctly! Check out this must-watch video now and learn essential techniques and tips for a thorough and effective face wash!
Personal Experience: Source
StyleCraze's articles are interwoven with authentic personal narratives that provide depth and resonance to our content. Below are the sources of the personal accounts referenced in this article.
i. Skincare: Trying Out Double-Cleansinghttps://kristineelse.com/blog/2017/1/30/skincare-double-cleansing


