How To Curl Hair With A Straightener – Different Techniques
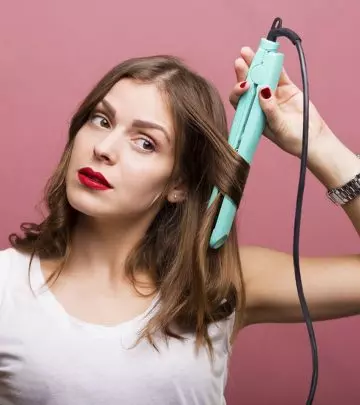
Image: Shutterstock
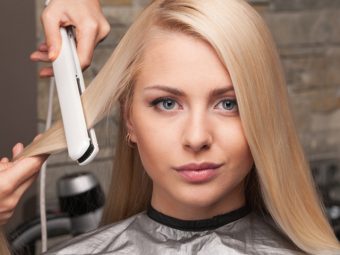
Straight-haired girls, if you want to curl your hair, we can help – that too without a curling iron! Want to know how to curl your hair with a straightener? You have come to the right place. A straightener is a versatile tool for styling your hair if you know how to use it. Here’s your step-by-step guide to curling straight hair with a straightening iron for bouncy, shiny, and voluminous curls. What are you waiting for? Get frizz-free and tangle-free curls that don’t droop within minutes with the technique shown here. Scroll down to get started!
In This Article
How To Curl Your Hair With A Straightener – Step By Step Guide
- Step 1: Prepping your Hair
You can shampoo and condition your hair to prepare it for curling. However, it is widely claimed that dirty hair (washed one or two days back) holds curls better than squeaky clean hair. So, you can curl your hair even if it has not been freshly washed. Just use dry shampoo to get rid of the grease.
- Step 2: Detangle Your Hair
Use your fingers or a wide-toothed comb to detangle your hair. You can use a detangling spray and a Tangle Teezer to make your hair more manageable, especially if you have thick locks that get tangled easily.
- Spritz the detangler spray through the length of your hair, avoiding the roots and scalp.
- Use a wet brush or Tangle Teezer to gently spread the product throughout the hair strands. This step helps in eliminating knots and taming frizz and flyaways. The hair is particularly vulnerable at this stage, so be gentle.
Avoid: Do not tug on your hair or brush it when it is wet.
Tip: If you have thinning hair, use a root booster to add some lift and volume to your hair. Keep your hair wrapped
- Step 3: Apply Heat Protectant
The most important step is to protect your hair from damage. This is the most crucial product to use before styling your hair with a flat iron or any heat-styling tool. A heat protectant will minimize the damage to your hair from the hot flat iron. It coats the hair and protects it from humidity and high temperatures. The anti-static property of the heat protectant also controls frizz and leave your hair glossy and smooth.
- Apply or spritz on the heat protectant before you start curling your hair.
- Spread it evenly through the hair strands, coating them till the tips as they are usually drier and more prone to damage.
Avoid: Do not apply the heat protectant on the roots. Start from a couple of inches away from the roots.
Tip: Divide your hair into 3-4 sections before applying a heat protectant to make sure you coat the under-sections of your hair.
- Step 4: Section Your Hair
You need to divide your hair into small, workable sections, depending on your hair volume and thickness.
- Tie up the top section of your hair, picking it up from your temples, into a loose but firm bun. Secure it with clips.
- The lower part of your hair (above the nape of your neck to your ears) can be divided into two equal sections.
Avoid: Do not get lazy and pick up big sections when curling your hair as this will result in loose curls that unfurl quickly.
Tips: Smaller sections will give you textured beach curls while larger sections will help you get those glamorous waves.
- Step 5: Curl Your Hair With A Flat Iron
Work with two-inch sections of your hair and a rounded flat iron for best results. This will give you softer, more natural-looking curls.
Caution: Don’t set the heat on too high. High temperatures can damage your hair, especially if it is colored or processed.
- Bring the bottom section of your hair to the front.
- Pick up small sections and wrap the hair 360° around the flat iron with the ends freely moving between the plates.
- Slowly relax the pressure on the plates and move the straightener gently toward or away from your face. This will result in a curl.
- Make sure your flat iron is adequately hot and keep your hair wrapped around it for 10 seconds. This will ensure that the curl lasts longer.
- After you finish curling the bottom section, untie the top knot and curl it in the same fashion.
Avoid: Never hold the flat iron in your hair for more than 10 seconds. Keep moving so that it does not damage the hair strands.
Tip: You can roll up and hold the curl with a bobby pin right after removing it from the flat iron. You can untie it after you finish curling all your hair. This will make your curls last longer.
- Step 6: Lock It In Place
This is important to lock your curls in place and prevent them from unfurling or falling flat.
- Spritz on a setting spray to set the curls in place.
- Once the hair cools down, tease it at the roots and gently run a brush through it to loosen the curls and make them look bouncy.
- Massage your scalp gently in a circular motion to lift your hair at the hairline.
Tip: Flipping your hair forward and running your fingers gently through the curls can add volume and make the curls look more natural.
There are various ways to curl your hair with a straightener. You can curl your hair in horizontal sections for classic roller curls or vertical sections for those coveted beach waves. Using a straightener to curl your hair is an important prepping step for styling it into elaborate chignons and hairstyles. We have covered the most popular techniques for you in the next section. Keep reading to learn more!
How To Curl Your Hair With A Straightener Using Different Techniques
Professional hairstylists have been using straighteners to curl hair for years as it is quicker and more effective to get loose, natural waves and curls. Flat irons smoothen and add shine to the hair by locking in moisture and controlling frizz. Since a flat iron has a larger surface area, it curls hair on both sides, resulting in well-textured curls in a shorter time. This also means your hair won’t droop or fall flat after you finish styling, so your curls last longer than usual.
So, go ahead and learn the different techniques to curl your hair using a flat iron.
I. The Slide Technique
This is the easiest and most common technique used to curl hair with a straightener:
- Take a one-inch section of hair and slide the flat iron through it while slightly bending it inward and outward.
- This zig-zag motion – similar to the way you start the car ignition – gives you that “just out of bed” natural curls.
- You have to be gentle and start at the roots. This helps in creating soft “slide” waves or curls that perfectly frame the face.
- A quick, taut motion can help you get tight or crimped curls.
II. The Pressing Technique
This technique needs a little bit of practice:
- Pick up an inch-wide section of hair and bend it in an “S” shape.
- Place the flat iron right across the “S” to curl it.
- You can get more dramatic “S” curls by braiding a section of your hair and running a flat down its length.
- You can also use this technique to create old Hollywood curls. Twisting it in alternating 180°motions will give you those glamorous curls.
III. The Doorknob Technique
Named after the movement of opening a doorknob, this technique is the most complicated one. However, it gives the best curls, so it is worth learning.
- Take a one-inch section of hair and bend it in a “C” shape.
- Now, place the flat iron at the top of the section and move your wrist like you would twist a doorknob. This creates gorgeous waves.
- You can customize the tightness of your curls as you get familiar with this technique.
- You can wrap the hair fully or half-way around the flat iron to get different types of curls.
- If you wrap the hair vertically, you can get the glam or Hollywood lux curls using this technique.
Apart from these techniques, there are a few important factors to consider while using a straightener to curl hair. Therefore, we have compiled some useful hacks for you to get natural and gorgeous curls.
Flat Iron Hacks To Curl Your Hair
- Don’t forget to use a heat protectant or a thermal styling spray before you start curling your hair with a straightener.
- Make sure you evenly distribute the products (heat protectant, detangler spray, setting spray) throughout the length of the hair strands.
- Keep the straightener away from your roots and scalp.
- Keep moving the flat iron so that the heat is not concentrated on one part of your hair.
- Work with small sections of hair to minimize heat damage. You also get better results when you work with smaller sections of hair.
- Start your curls from eye level for more flattering curls.
- For beach waves or mermaid hair, start curling from the mid-shaft for a natural look.
- Leave out the ends or curl them gently for natural-looking curls.
- You can alternate between inward and outward curls for a bohemian look.
- Consider the direction of the curls and your haircut before styling your hair.
- Straighten the section of hair once before curling it to get smoother results.
- Take one or two-inch sections of hair for loose curls. If you want tight curls, work with even smaller sections of hair.
- A setting hairspray or a sea salt spray will ensure that your curls last longer without unraveling.
Now you know how to curl your hair with a straightener using different techniques such as the slide and pressing techniques. Remember to follow the aforementioned pre-care tips before you straighten your locks. These tips will ensure your curls last longer and look salon-styled. Also, keep those flat iron hacks in mind to guarantee voluminous and well-structured curls. At first, you may need to keep referring back to this article to ensure you have curled your hair the right way. But as you keep practicing these techniques, you will become a pro!
Key Takeaways
- The larger surface area of the flat iron helps curl the hair on both sides. As a result, you can achieve well-textured curls that last longer.
- You can use different methods like the slide technique, pressing technique, or doorknob technique.
- Never hold the straightener at one place for more than 10 seconds to avoid potential damage. Always use a heat protectant.


