How To Do A Messy Bun With Long Hair: Ideas And Tutorials
Glam up your long locks with these steps, for there is no time to settle for the basic hairstyles.
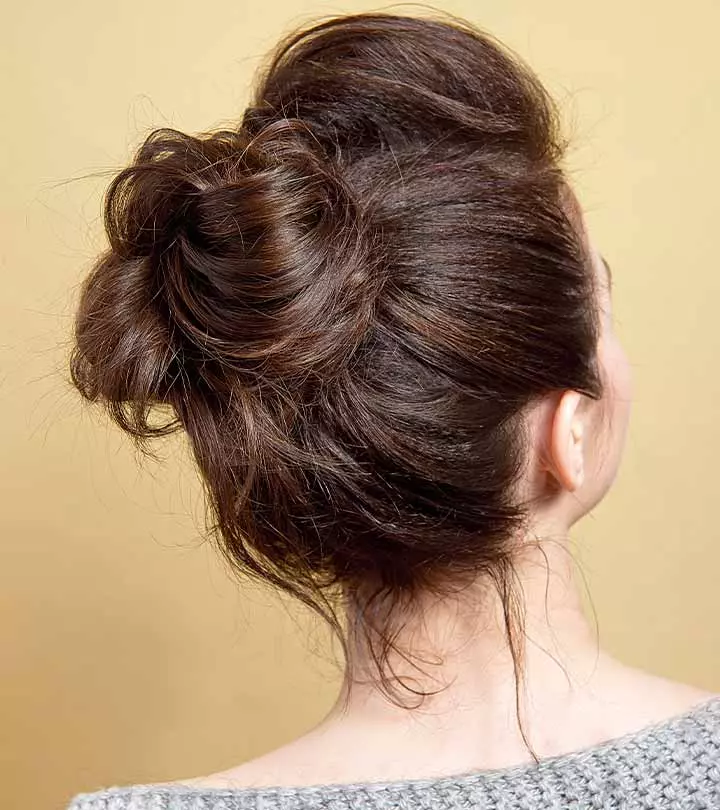
Image: Shutterstock
Messy buns are simple, effortless, and stylish. They are your savior for days you are running late for work or haven’t washed your hair. However, pulling off this look with long locks needs a bit of practice. But once you have it down, you are not going to want to do anything else with your hair!

Award-winning hairstylist Alicia Igess Jones says, “Long hair is the most versatile when you pin it up. It doesn’t matter if it’s thick or thin. You can pull your hair up in sections if it is too thick or too much for you to handle at once when attempting to pull it up.” If you are wondering how to do a messy bun with long hair, we can help. We have shared a collection of 12 messy bun looks with step-by-step tutorials to help you master this low-maintenance hairstyle with ease. Scroll down to check them out.
 Before You Get Started
- Gently curling the parts of your hair to form little tendrils can easily transform this hairstyle into a romantic one.
- Keep in mind that a messy bun isn’t meant to be flawless. It’s acceptable if it appears a little casual and messy.
- Braid your hair at night to help create beautiful and flowing waves in the morning
In This Article
What Is A Messy Bun?
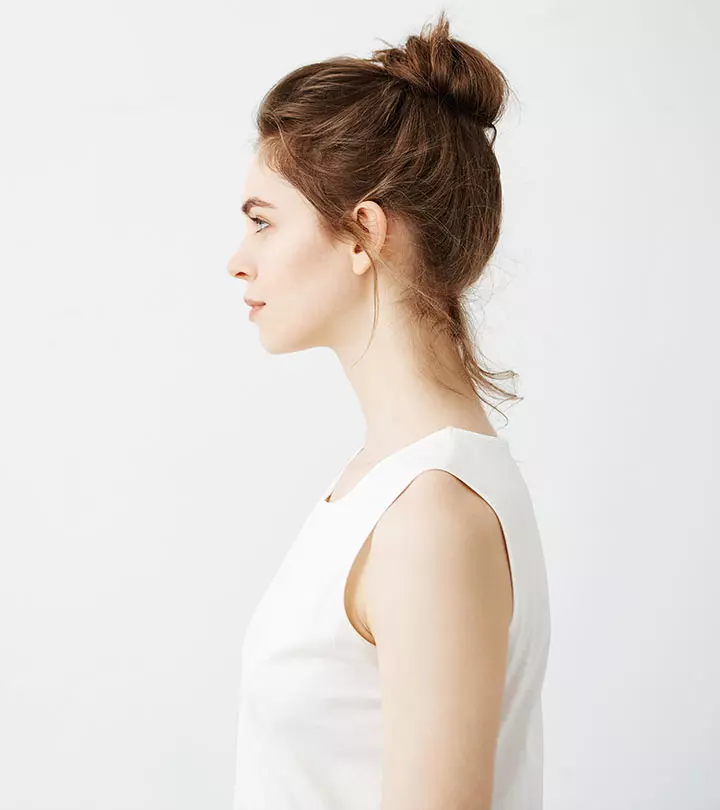
Messy buns are casual top knot hairstyles that require less time and look effortlessly chic.
These buns add volume and texture to your hair and are perfect for every event. They have a dreamy look, perfect for summers, and require only rubber bands, bobby pins, and a few embellishments here and there!
Jones adds, “Messy buns can be worn on top of your head or towards the nape of your neck. They require less time because they don’t have to be perfect. These buns definitely fit the effortlessly chic look. They create texture and work perfectly for any event. They have a dreamy look, perfect for summer, and require only rubber bands, hair pins, and bobby pins.”
It is easy to create messy buns for short hair. However, you can pull off the look with long hair too. Check out the messy bun tutorials below to know more.
Key Takeaways
- Messy buns work well on both clean and unwashed hair. In fact, they look best in two-day-old hair.
- You can try easy messy bun hairstyles like high buns, half updos, and low messy buns.
- You don’t need a comb for doing messy buns. All you need is a rubber band and a few bobby pins.
- Messy buns are perfect for all hair types, including long curly hair.
How To Do A Messy Bun With Long Hair – 12 Cute Styles
1. Messy Bun With A Semi Crown Braid
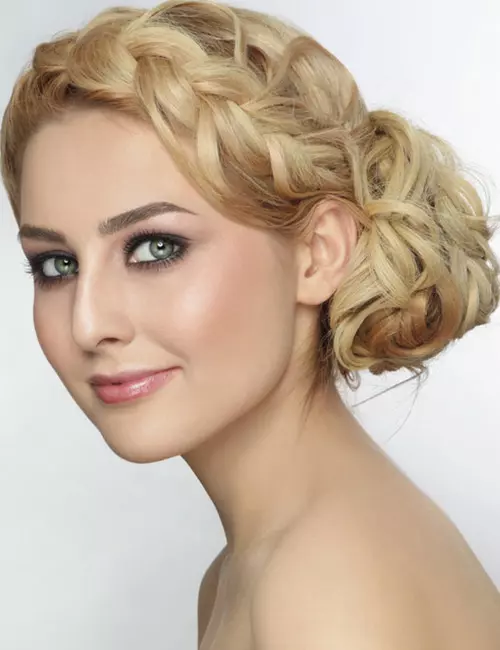
This is a fantastic option for anything whimsical, romantic, or bohemian! Everything-an engagement party, a girls’ day out, a date, a bohemian wedding-works with it. This style will surely enhance your look, whether you choose to French braid it or wear it naturally.
- Divide your hair from the front of one ear to the front of the other ear to form two sections of hair – a top and a bottom. The bottom section of your hair should be larger.
- Begin weaving a lace braid from one ear along the front hairline. A lace braid is like a French braid but you only keep adding hair from the front hairline to the corner section closest to it.
- Keep weaving the braid so it follows your front hairline. Once you reach the other ear weave the rest of the hair in a regular braid and secure it with a hair tie.
- Curl the bottom section of your hair, below the nape, using a curling iron. Make sure the curls are not tight.
- Make a low side bun with the bottom section of hair and secure it with hair-colored bobby pins.
- Take the braid and tuck it underneath the bun.
- Decorate the hairstyle with floral pins or delicate hair vines for a nature-inspired look.
- Spritz a good amount of hairspray on the hairstyle to keep the hairdo in place for a long time.
2. The Double Messy Bun
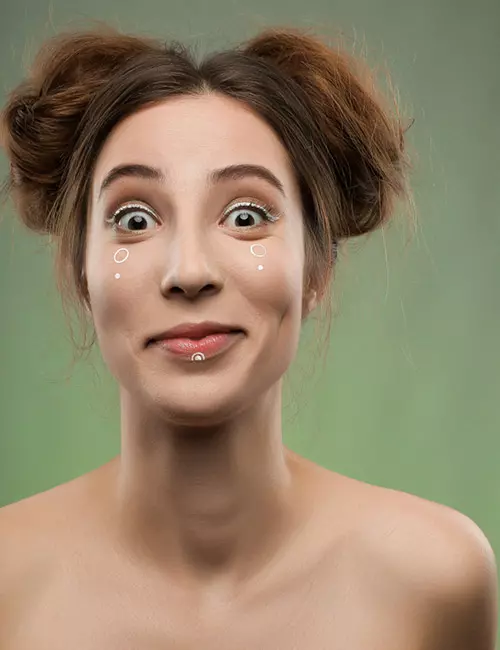
This is one of the best messy bun hairstyles that will make you look great for a casual day outing. Double messy buns, or “space buns,” are fashionable, fun, and ideal for relaxed movie nights, friend dates, or even if you’re attending a music festival! Your appearance will be greatly enhanced by this hairstyle. This hairstyle will definitely make you look great.
- Brush your hair and part it down the middle.
- Create 2 ponytails on either side and secure them with elastics.
- Wrap the ponytail around the base of your ponytail to create the buns.
- Let some strands loose and give it a natural, carefree, messy look.
- Spray some glitter mist evenly on your hair for a shiny appeal.
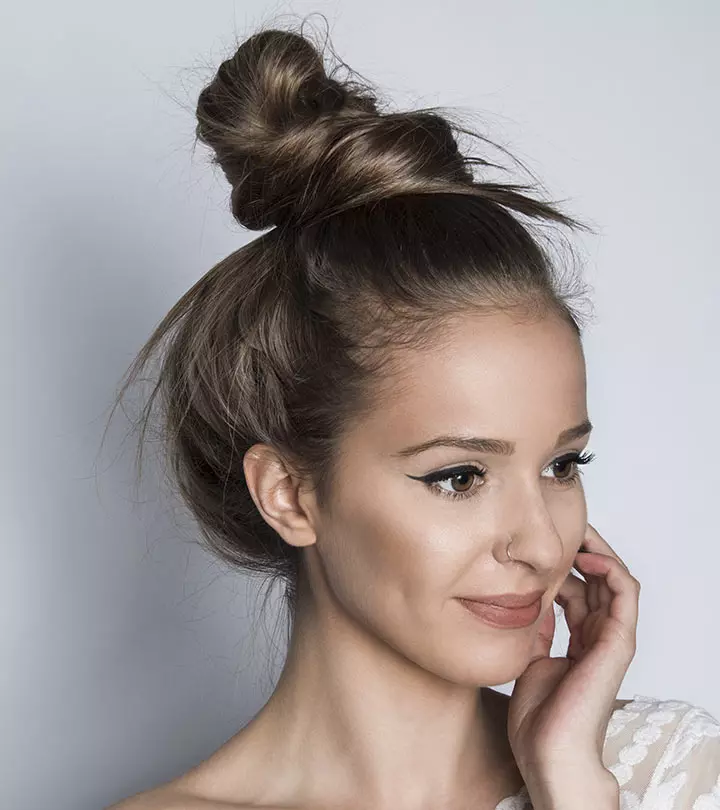
3. The High Messy Bun
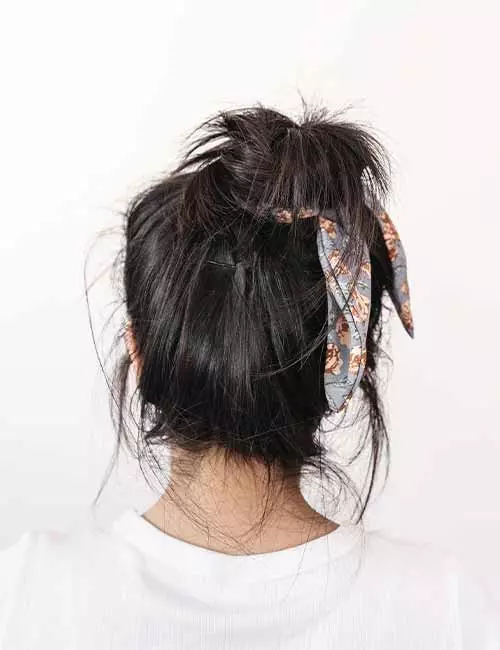
This look is perfect for everyday styling and could be great for casual brunches! It works perfectly for both shampooed and unwashed hair.
Steps:
- Gather all your hair and pull it up into an unfastened ponytail. You can skip using a comb and let the short strands drop loosely.
- Twist the length of your hair, spin it around the base of your ponytail, wrap it beneath the bun, and secure it tightly.
- Use a hair tie or a few bobby pins to secure the ends of your hair.
- Add a designer headband or use statement clips for a touch of elegance.
 Quick Tip
4. Half-Up, Half-Down Bun

This trendy half-updo messy bun looks sophisticated, chic, and perfect for days when you are in a hurry. It is great for casual coffee dates and even ideal for formal looks.
Steps:
- Take the top section of the hair and pull it back to tie a ponytail. Leave the bang area as it helps to frame the face.
- Tug the secured hair to loosen it a bit and create volume.
- Twist the ponytail around its base and secure the bun with a few bobby pins.
- Tug the bun gently to loosen it for a messy look. You can wrap a velvet ribbon around the bun for a sophisticated touch.
- You can curl the loose locks in the front to create a chic look.
 Quick Tip
5. Messy Hair Bun With Bangs
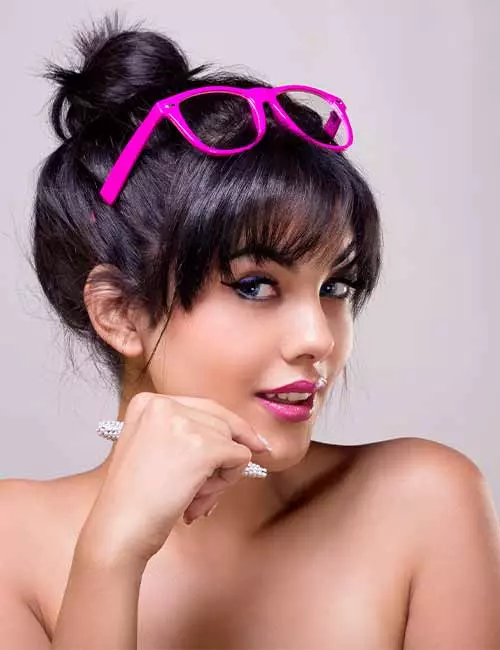
Girls with bangs can also try the messy hair bun. It is a brilliant hairstyle option for laid-back outings.
Steps:
- Leave out your bangs and gather your hair into a ponytail. Secure with a rubber band.
- Twist the ponytail around its base to form a bun and secure it with another rubber band and a few bobby pins.
- Gently pull the bun to loosen it, giving it a puffy look. You can wrap the bun with a silk scarf for an aesthetically pleasing look.
- Style the bangs with a flat iron to give a sleek finish.
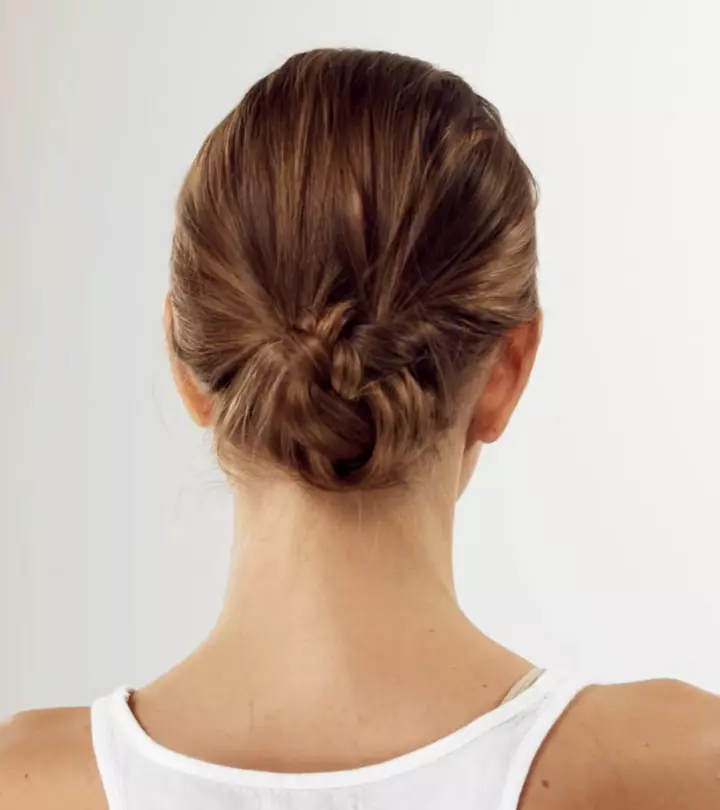
6. Low Messy Bun With Long Hair
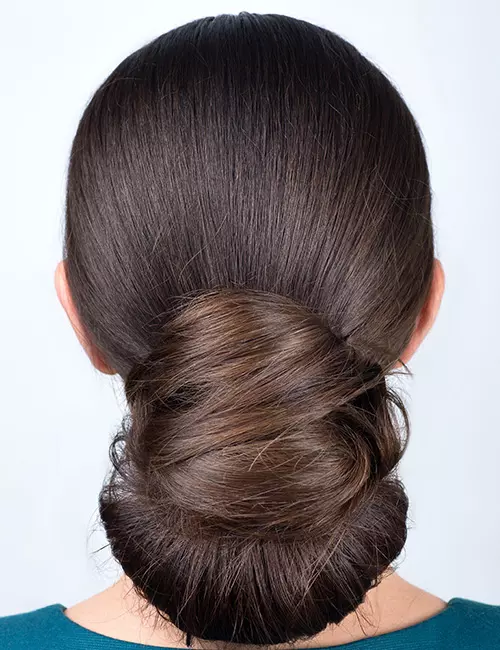
This low messy bun is perfect for straight, wavy, thick, and long hair. You can sport this look at work or formal events, and even weddings.
Steps:
- Tie a low ponytail closer to the nape.
- Wrap the hair halfway through to create a loop, as shown in the image.
- Wrap the tail around the rubber band and pin it.
- You may use hairspray to ensure this low bun hairstyle lasts throughout the day.
- Decorate the bun with a jeweled barrette for a refined appeal.
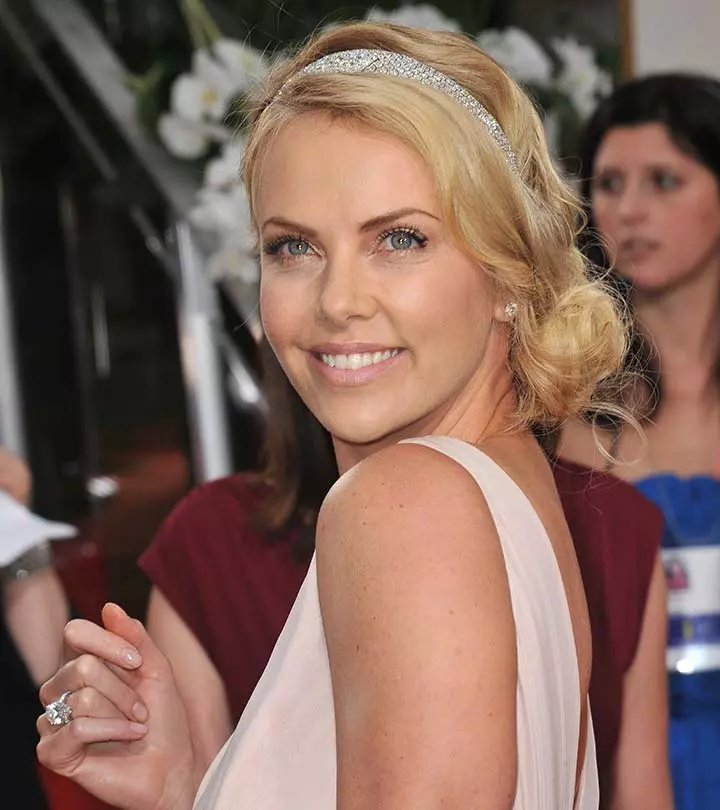
7. Messy Side Bun With Long Hair
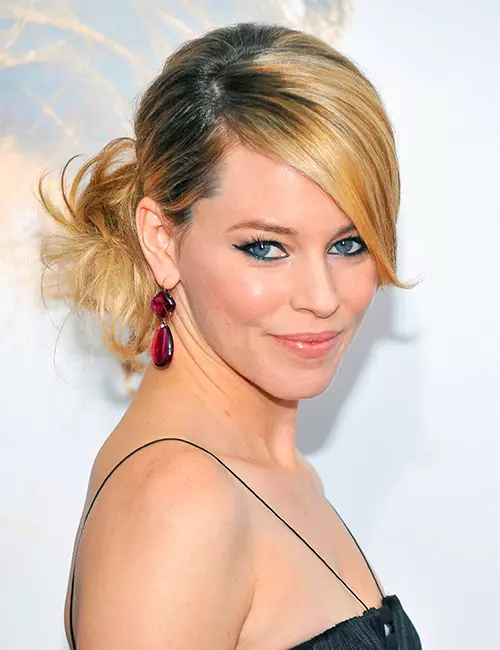
The messy side bun is one of the classic and most elegant hairstyles, suitable for evening parties and formal dinners. And there are various ways to try your hand at this hairstyle. However, this one is the easiest way to nail this bun style.
Steps:
- Comb, tease, and style your hair to add volume to it.
- Gather your hair to one side of your head and tie it into a ponytail.
- Separate your hair just above the rubber band and loop the ponytail halfway through it.
- First, secure the loop with bobby pins, and then secure the loose ends around the loop with bobby pins.
- Place crystal hairpins strategically on the hair for a stunning hair look.
8. Bouffant Bun
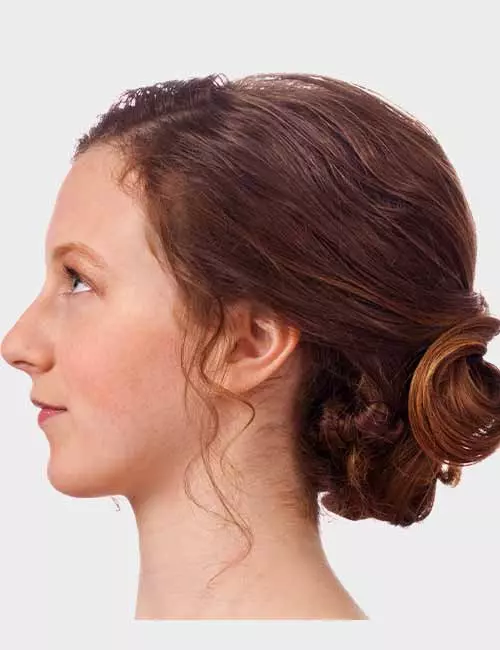
Just as the name suggests, the bouffant bun has volume and roundness to it. This unique hairstyle is suitable for weddings, red carpet events, and evening parties.
Steps:
- Comb your hair with a wide-toothed comb and remove all knots.
- Section out a vertical line from one ear to the other and separate this frontal section of the hair. Clip it separately so that you can work on the remaining hair.
- Create a classic and basic messy bun with the remaining section of hair. Secure it properly with bobby pins and a rubber band.
- Divide the hair at the front into four equal parts.
- Backcomb the bottom section closer to the ear and pull it to the back of your bun.
- Wrap it around the bun’s base and secure it with a bobby pin. Repeat the process with the other bottom section.
- Create a pouf with the remaining two frontal sections and secure it at the bun’s base for a voluminous look.
- Add a vintage headband for a royal touch, or you may go for a tiara for a grand appeal.
9. Braided Messy Bun
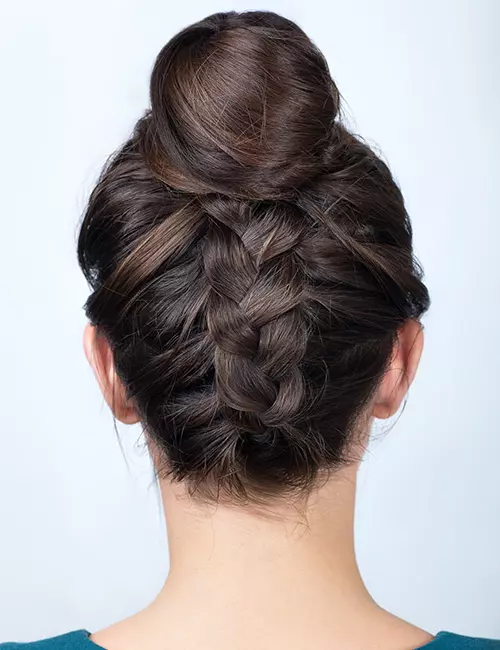
Braided messy buns are stylish and look charming! They are suitable for casual gatherings and cocktail get-togethers.
Steps:
- Gather the hair from the nape and weave it into an upside-down French braid. You can intertwine a lace ribbon with the braid for a dainty, refined look.
- Gather all your hair (including the braid’s end) and tie it with a rubber band.
- Pull the hair halfway through the rubber band to create a loop.
- Wrap the rest of the hair around the bun’s base.
10. Messy Bun With A Donut
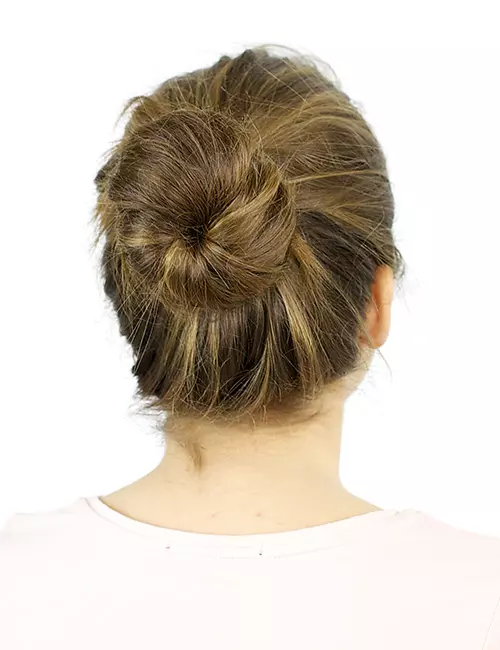
This hairstyle is best for beginners and those who have long straight hair. It is a great style for elegant dinner parties and formal events.
Steps:
- Gather your hair and tie a high ponytail.
- Pull the ponytail through the donut and put it at the base of the ponytail.
- Wrap the hair around the donut and secure the ends with bobby pins.
- Add a twisted fabric scarf around the bun for a tasteful look.
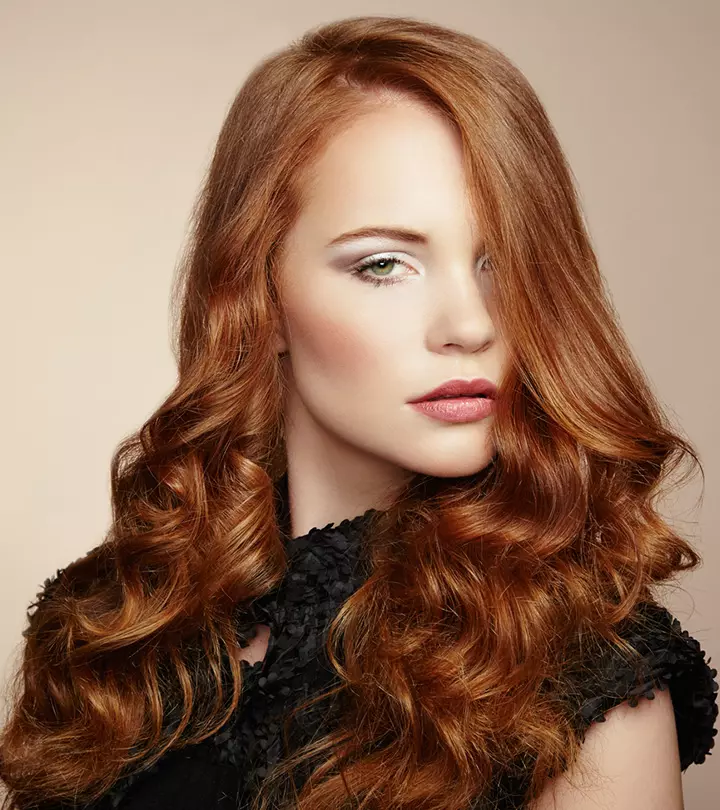
11. Messy Bun With Long Curly Hair
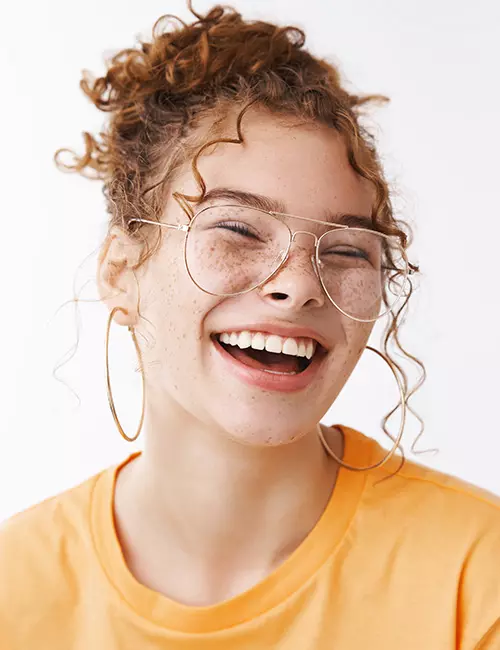
Messy buns look equally good in curly and kinky hair. The curls can make the bun appear voluminous. This hairstyle is perfect for summer outings, both casual and formal, and music events.
Steps:
- Gather your curls into a high ponytail.
- Twist the ponytail gently and wrap it around its base.
- Secure it with bobby pins. You may add boho-inspired beads for a captivating appeal.
12. Messy Bun Without Bobby Pins
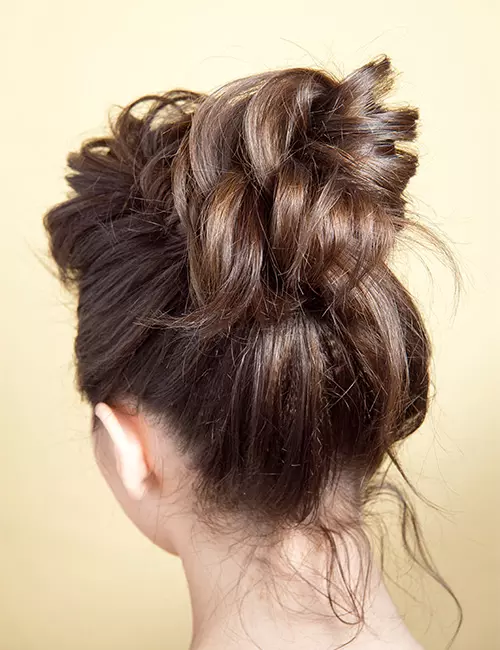
This is a great look for last-minute, on-the-go styling, and lazy days. Try this cute messy bun hairstyle if you do not have bobby pins and your hair is a mess.
Steps:
- Gather your hair into a high ponytail.
- Take a rubber band, and twist it once, as shown in the image.
- Create a donut with the hair around the center of the ponytail.
- Tie the hair with the rubber band, as shown in the image. Pull the tied hair section to give it a donut-like shape.
- Gather the remaining hair to the front.
- Pull the rubber band in the front and stick the hair ends back into it.
- Complete the look with a soft, elegant hairband for a graceful appeal.
Emma, a blogger, talks about her favorite way of creating a messy bun hairstyle that is easy to do and without the help of bobby pins. She states, “Ironically, messy buns can be quite a challenge. But, after trying numerous techniques and borrowing some ideas here and there, I have finally come up with my own method, which I think results in a beautiful and versatile messy bun! The best part? No bobby pins necessary(i)!”
These are some spectacular ways to style your hair in effortless messy buns. However, the perfect messy bun look is only possible if you adapt the hair-tying technique to suit your hair type and texture. Scroll down to learn about the adjustments you should make to achieve the effortless messy bun for your hair.
Messy Bun Techniques For Various Hair Types
The stylish and effortless messy bun hairstyle works for all hair types. With small adjustments before, during, and after tying your hair, you can achieve the dreamy, messy bun look. Here are key tips to help you customize this technique, depending on your unique hair texture.
Straight Hair
- Lightly tease the roots with a tail comb or spritz some texturizing spray on the hair to create volume.
- Secure the bun with a tight elastic and use bobby pins to hold the flyaways in place.
- Gently pull out the strands around the crown for a fuller look.
Wavy Hair
- Spritz some sea salt spray on the hair to enhance the natural wavy effect.
- Twist sections of your hair before wrapping it in a bun. This will add dimension to the hair.
- Pull some face-framing pieces from the front and add some natural movement.
Curly Hair
- Gather loose curls from the top of your hair by finger-combing them for a natural but dreamy messy texture. Avoid combs and tools that can snag and cause breakage.
- Do not over-manipulate your hair by tightly wrapping and twisting the strands. Instead, gently scrunch your curls in place and secure them into a bun with a large hair tie.
- Smooth your baby hair with a lightweight gel or pomade. After applying the gel, comb the hair with a soft, bristle brush for a sleek contrast to your curly strands.
- Consider using hydrating anti-frizz products to maintain good hair health for curly hair that is prone to dryness.
Coily Or Kinky Hair
- Coily hair tends to shrink more than other hair types. So, using the banding method (tying sections of hair with bands and stretching them) to stretch out your hair can offer a fuller appearance.
- Apply a lightweight hair butter or oil to moisturize the hair and make it manageable before tying it into a messy bun.
- Secure the bun with a puff cuff or an oversized scrunchie to hold the hair firmly without pulling too tightly.
A perfect messy bun looks fluffy, effortless, and voluminous. However, it is important to steer clear of common mistakes that can make your bun look flat and rough. Keep reading to explore the typical mistakes that people make and learn how to avoid them.
Common Mistakes And Tips To Avoid Them
Messy buns are meant to look effortless and chic. Certain common styling mistakes can make them look unbalanced and flat. Below, we have highlighted the common errors that people make while tying these buns and how you can avoid them. Read on.
- Skipping The Prep Step: Tying a messy bun on freshly washed hair can lead to unsatisfactory results due to the lack of grip in clean hair. The bun can easily come undone as you go about your day. Apply mousse or mist hairspray to the hair to add grip, helping the bun to stay put for hours.
- Tying The Bun Tightly: A tight bun makes for a flat look, creates tension on the scalp, and can even cause hair breakage. So, go about this style by holding the bun loosely and securing it with a soft scrunchie or spiral tie. Then, gently pull out some strands from the front to add movement to the hair.
- Not Adding Texture: If you have limp, straight hair, a messy bun hairstyle would look too plain, and the messy texture will not stand out. Spritz some texturizing spray on the hair before tying it to create hold, volume, and movement.
- Over-Manipulating Hair: If you have coily, kinky hair, over-styling and tightly securing it can cause frizziness. Instead, gently hold the curls at the top and secure them with a soft scrunchie to retain the natural curl shape.
- Not Fixing The Bun Properly: A messy bun should look carefree, but it still needs balance and structure. Skipping hair clips can make your bun look unkempt rather than effortless. Place multiple clips strategically, such as securing them in an X-shape, for extra hold and support.
Infographic: 6 Cute Messy Bun Styles For Long Hair
Long hair offers endless possibilities for styling, and one popular and versatile option is the messy bun. Whether you are going for a bohemian vibe, a casual look, or an elegant style, there are various ways to rock a cute messy bun with long hair. Get ready to elevate your messy bun game! Check out the infographic below for the best styles you can sport.
Some thing wrong with infographic shortcode. please verify shortcode syntax
We all go through the bad hair days and understand the struggle they bring to us, especially when the hair is long. But if you know how to do a messy bun with long hair, managing bad hair days becomes easier. We hope the tutorials shared in the article will help you style your long hair effortlessly.
Frequently Asked Questions
How can I make my messy bun last all day?
Apply strong gel, mousse, foam, or cream to your hair before styling your locks in a messy bun. After you style your hair, spritz on a good amount of hair spray to secure your messy bun. Carry a travel-sized hairspray product with you so you can spritz it on throughout the day.
What accessories work best with a messy bun?
Hair accessories like scrunchies, headbands, and decorative pins work best with a messy bun, adding style and securing the look in place.
Do messy buns damage your hair?
Yes, but only if you tie your hair in a bun too often. Tying your hair tightly in a bun frequently can lead to hair breakage and gradual hair loss due to excessive pulling at the roots.
What is messy hair called?
Messy hair may be called tousled, disheveled, or ruffled hair.
Is a messy bun professional?
No. A messy bun is not considered a professional hairstyle as it looks careless and unkempt.
Illustration: How To Do A Messy Bun With Long Hair: Ideas And Tutorials
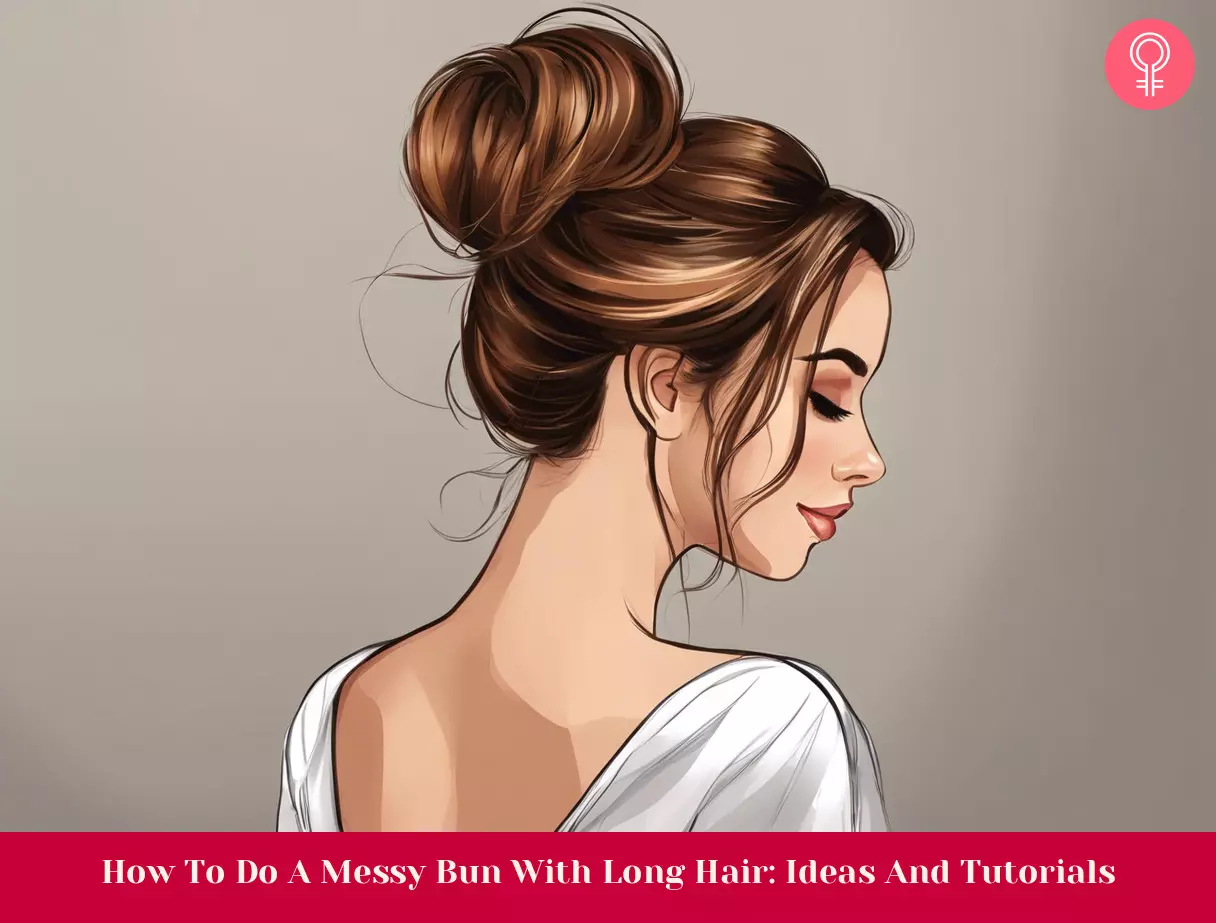
Image: Stable Diffusion/StyleCraze Design Team
Discover the effortless and trendy messy bun hairstyle with this tutorial! Perfect for any occasion, this easy-to-follow guide will help you achieve the chic and undone look you’ve been craving!
Personal Experience: Source
StyleCraze's articles are interwoven with authentic personal narratives that provide depth and resonance to our content. Below are the sources of the personal accounts referenced in this article.
i. My Favorite Messy Bun (NO bobby pins!)https://setongirlshairstyles.wordpress.com/2017/07/04/my-favorite-messy-bun-no-bobby-pins/
Read full bio of Alicia Igess
Read full bio of Sushmita Barman
Read full bio of Madhumati Chowdhury
Read full bio of Aparna Harry




Community Experiences
Join the conversation and become a part of our empowering community! Share your stories, experiences, and insights to connect with other beauty, lifestyle, and health enthusiasts.