How To Pierce Your Nose At Home: A Step-By-Step Guide
Discover the ins and outs of safely piercing your own nose in the comfort of your home.

Image: Shutterstock
You might have come across viral internet videos or blog posts teaching you how to pierce your nose at home, promising you that it is quite a straightforward process. They might tell you that it barely feels like a pinch, is convenient, and blessedly inexpensive. Technically, it is a straightforward process that can be executed using regular household tools for way cheaper than your local piercer may charge you. However, before you dive into it, it is important to be aware of the risks involved and the things that may go wrong if you are not an experienced piercer yourself.

To begin with, all piercings come with the risk of extremely painful infections, even when performed by a skilled and experienced professional piercer. Hence in this article, we shall provide you with all the important information and the precautionary measures you need to take. So, scroll down to find out.
In This Article
Is It Safe To Pierce Your Own Nose?
Any body piercing process, despite taking all possible precautions, is not entirely risk-free or safe. There is a high possibility of infections for all open wounds that are exposed to environmental bacteria before they are completely healed. Here are a few issues that make piercing your own nose riskier than a professional piercing job:
- The sanitizing measures may not match up to the standards guaranteed by professional piercers.
- The equipment may not be sharp enough or your hand may not be steady enough to ensure a clean job.
- A badly done piercing may also be more painful, challenging to take care of, and end up in permanent scarring.
Keep in mind that these are only some of the hazards that we shall delve deeper into in the following sections. But before that, let us look at the aspects you need to consider when doing your research about an at-home nose piercing procedure in the section below.
Key Takeaways
- Piercing your nose at home may be more affordable and convenient compared to going to an experienced and expensive piercer.
- It comes with risks such as infections, allergies, excessive bleeding, and scarring.
- The healing process spans several weeks wherein you need to make certain lifestyle changes such as heightened hygiene measures and avoiding alcohol, swimming, prolonged showers, exercise, and direct sun exposure.
Factors To Consider Before Piercing Your Nose
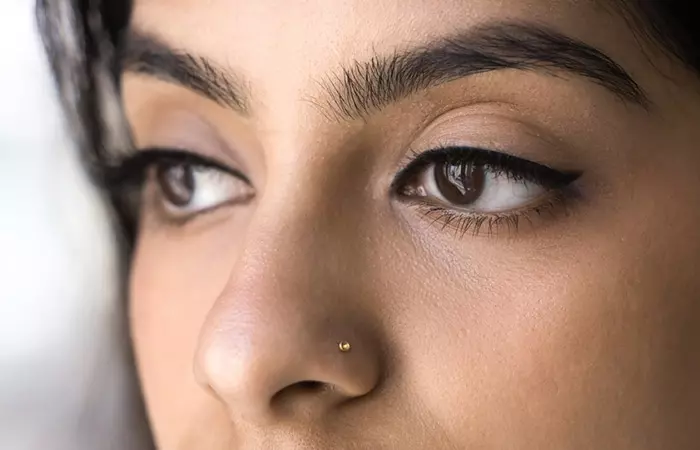
It is important to mindfully envision and plan your nose piercing before you get down to the process. These are a few things that you must be aware of as they will hugely impact your nose piercing procedure:
1. The Anatomy Of Your Nose
There is a complex network of nerves, cartilaginous tissues, and blood vessels in different parts of your nose. You must be aware of these structures to ensure you do not pierce critical points, leading to long-term damage. Here are some fundamentals you should be aware of:
- There is a thick cartilage dividing your nostrils, more commonly known as the nasal septum. It is packed with multiple nerve endings and causes significant pain upon piercing. It also has an abundance of blood vessels and can result in excess bleeding, even hematoma (clotted blood between tissues) (1).
- The commonly pierced outer rim of the nostrils contains comparatively fewer nerve bundles and blood vessels, making it a safer piercing placement.
2. Your Pain Tolerance
Piercing can be painful, more so when done by inexperienced hands. You can choose from the following pre-piercing solutions to minimize the pain from the piercing process:
- Over-the-counter pain medications before the process to numb the spot.
- Special numbing creams.
- Meditation, deep breathing, or other relaxation techniques for mental preparation.
3. Any Allergies Or Medical Conditions
If you have any allergies or some medical issues for which you might be taking blood-thinning medication, it can ruin your piercing experience.
- The allergies can reject the jewelry and make the healing a painful and long-drawn process.
- Medical conditions can weaken your immune system, increasing the risk of infection and further delaying the process.
- Certain blood-thinning medications trigger increased general bleeding complications and may cause the piercing to bleed excessively (2).
Therefore, consult a doctor for potential allergies and discuss if any of the medications you might be on are safe for you to move forward with.
4. Your Choice Of Jewelry
It is important to consider the material and style of your jewelry, at least for the initial couple of weeks. Some metals are notorious for causing allergies while others may just be an inconvenience in your day-to-day life. Select a simple piece of jewelry, such as plain rings or captive beads instead of intricate filigree designs that are sure to snag on hair, clothing, and bedsheets. Try to wear a fit very simple light nose stud and avoid wearing a hoop or ring during the healing period.
5. Types Of Piercing Needles
In this article, we will tell you how to use a regular sewing needle. However, based on the kind of piercing you envision and your requirements, you might want to know about different piercing tools. Look into hollow piercing needles as they are popular at-home piercing devices for piercing studs.
6. Adequate Aftercare Practices
The most important objectives of piercing aftercare are to heal the piercing properly and keep infections at bay. Failure to do so may result in the infection escalating to fever and more severe complications.
If you can commit to understanding the above-mentioned factors and implementing precautionary measures, you might be able to pull off a smooth nose piercing job at home. Learn the step-wise process in the next section.
How To Pierce Your Nose At Home
We have covered the challenges that entail the process of piercing your nose at home. Now let us break down the process to understand how it can be done.
1. Gather Your Supplies
You will find almost everything you need at home. There might be certain tools that may not be available around you, but it is easy enough to purchase from an online or local drug store. Here is a list of the things you need:
- Sterilized 18G surgical needle sewing needle (21-18 gauze or 0.8-1.2mm)
- Sterilized jewelry of similar thickness as the needle
- Sterilized piercing clamp (optional)
- Clean surgical gloves
- Rubbing alcohol
- Cotton pads or balls
- Clean tissue or paper towels
- A few ice cubes
- Marker pen
- Mirror
- Saline solution
- Aftercare cream
2. Ensure Your Skin Is Clear And HealthyIf you have any active breakouts, rashes, infections, or injuries on your skin, hold off the piercing process. A compromised skin increases the chances of infection. Therefore, it is best to wait until your skin is healed and is blemish-free.3. Mark The Piercing Spot
Take a marker pen and mark the exact point on your nose where you want your piercing. This step will ensure a clean piercing process with minimized pain and bleeding.
4. Sterilize The Jewelry
Soak your needle and jewelry in rubbing alcohol for at least 5 minutes to sterilize them. Make sure you soak the two items in two separate bowls to ensure maximum hygiene.
 Quick Tip
5. Clean Your Hands And The Piercing Area

Before you begin the actual piercing process, ensure you use an antiseptic liquid to clean your hands and your nose area. Use only a fresh and clean paper towel to pat dry as cloth towels may be contaminated by bacteria. Put on a pair of sterile gloves for good measure.
6. Numb The Area With Ice Cubes
Rub ice cubes on your nose until you feel all physical sensations in the area have considerably numbed. This may help minimize the pain during the piercing process and make you feel better prepared for it.
7. Pierce Your Nose
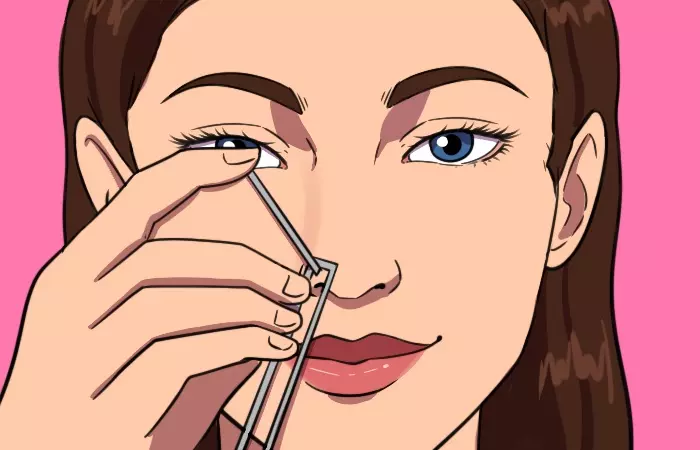
Look into a mirror so you can see the marked piercing spot clearly, hold the needle at 90 degrees from your skin, and quickly punch through the marked spot in a fluid motion. Using a clamp for piercing can ensure a clean and precise process. Also, the quicker you pierce the needle, the lesser the pain. Leave the needle in, remove the clam (if you are using one), and use cotton swabs or pads to dab away any bleeding.
8. Insert The Jewelry

Here is the important part. Insert your jewelry immediately after the piercing process to avoid closing the wound. Take a deep breath and when you are ready, smoothly pull the needle out and immediately insert the jewelry. Do not be too hasty or harsh while doing it.
9. Clean The Area Again

Wipe away any blood with tissues and use a cotton pad dipped in saline solution to wash and clean the area again. Follow up with an antibacterial cream to protect it from environmental dust and bacteria until the next cleaning session.
 Quick Tip
Piercing your nose is just the beginning. From this point, your piercing will undergo a long period of healing spanning several weeks and require utmost care from you. Let us take a look at the things that go into its maintenance and how long a nose piercing takes to heal.
Initial Nose Piercing Aftercare
In the early days following the fresh nose piercing, you may experience pain, swelling, and crusting at your piercing site, which is completely normal. But because this is going to be constant, it puts your piercing at risk of infections. So ensure you follow these initial piercing aftercare steps:
- Do not remove the piercing jewelry no matter how itchy it gets until your piercing is fully healed. Your piercing is supposed to heal around your piercing jewelry. Removing it may close up the wound, healing it in an improper, bumpy manner. You may change your jewelry after about 2 months.
- Wash your piercing with sea salt water or sodium chloride solution 2-3 times a day for 6-8 weeks until it is fully healed.
- Avoid touching your piercing constantly, especially with dirty hands. Ensure you wash your hands with an antibacterial soap before doing so.
- Apply a good antibacterial aftercare cream after washing to keep the piercing protected from environmental bacteria and ensure hydration at the site.
- Check regularly for any signs of infection so you may seek medical help at the earliest. An infected nose piercing may manifest as redness, painful swelling, and odorous yellowish pus discharge. If left untreated, it may escalate to fever and chills.
- Avoid strenuous physical activities that may lead to sweating and consequent bacterial infection from all the dirt and bacteria-carrying sweat.
- Avoid long hot water showers or swimming in communal or dirty water sources to keep bacterial infection at bay.
- Avoid exposing your piercing to outdoor pollution as it may also lead to infections. Also, avoid direct sun exposure as it irritates the wound and increases pigmentation around it.
- When you do remove your jewelry for the first time, do so gently to avoid potential trauma at the site.
- Avoid harsh chemical face wash. Face washes that contain harsh chemicals, fragrances, or alcohol can irritate a nose piercing and delay the healing process. It’s best to avoid these and opt for gentle, fragrance-free, and non-comedogenic face washes.
For all its potential dangers, piercing your nose at home may have some benefits. Take a look at them in the following section.
Benefits Of Nose Piercing At Home
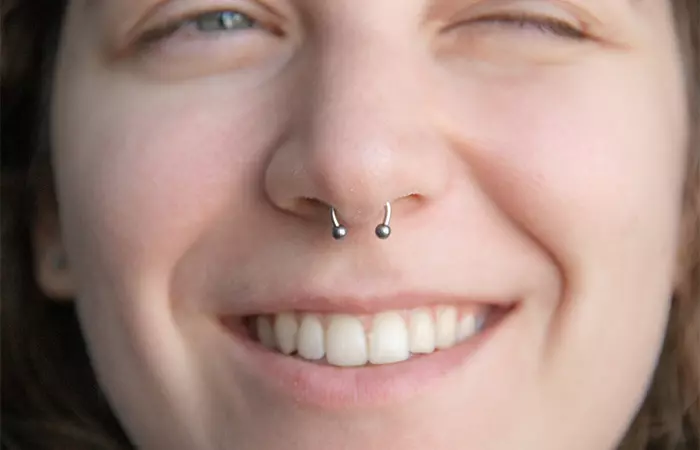
If piercing your own nose is part of a self-appreciation exercise, you will be glad to know that it does have the following benefits:
- It Is Affordable
The costs of expensive equipment, services of a licensed piercer, and even travel expenses are subtracted from the overall cost, making this DIY method appealing. - It Is Convenient
Since you will be performing the piercing yourself at your home and probably in your pajamas, convenience can be a driving factor. - It May Be Safer Than Cheap Establishments
Cheap piercing parlors may offer to do the job at a lesser price than high-end establishments, but they may not follow proper sterilization, sanitation of the piercing station, or even the piercing process itself. Piercing your nose at home may be safer than being pricked by a dirty needle or one that may have come in contact with infected blood. - It Provides A Sense Of Empowerment
Accomplishing a risky task such as this can be psychologically fulfilling, especially when many people are averse to the idea of any kind of body piercings other than the usual ones. If you can manage it without developing infections and ensuring complete and proper healing, then you can go ahead!
There are a few psychological advantages of doing your nose piercing at home, but it is important to note that there are some complications associated with it. Find out what they are in the section below.
Risks And Side Effects Of Piercing Your Own Nose
The risks of piercing your own nose at home are many, and if things go wrong, the complications can be distressing. Therefore, before you make a final decision, take note of the following potential risks:
- Infections
Be aware that despite the best hygiene measures, all healing wounds are susceptible to infections. A nose piercing is highly exposed to the environment and there is constant movement of unfiltered air around it. If the jewelry is too tight or the crusting is not cleaned regularly, it becomes easier for bacteria to invade the space and infect the raw wound. Further, you may not be able to ensure the best sterilization standards, making your tools unsafe. - Allergies
Avoid artificial piercing jewelry materials if you have skin sensitivity and your skin will perceive them as foreign objects attacking your immune system and reject them. Allergic reactions may manifest in the form of painful swelling, excessive itching, and prolonged healing. - Excessive Bleeding
If you have blood coagulation disorders or are on blood thinning medication, your piercing will bleed more than normal. Further, drinking alcohol before and after the piercing can also slow down wound healing (3). - Scars Or Keloid Formation
Hyperpigmented scarring at the piercing site or the development of bumpy keloid scars are common side effects of even professional nose piercings. In case you do a shoddy piercing job with unsteady hands, the risk of keloid or deep scarring significantly increases.
All of this might sound intimidating but there are a few critical steps you can take to ensure the risk of an infection is minimized. Keep reading to learn more.
Tips To Prevent Infection
The first step to prevent infection is to be aware of all the potential causes and be mindful of them. Further, try to ensure the following:
- Research the anatomy of the nose and plan your piercing well.
- Buy jewelry made of hypoallergenic, safe materials like gold, stainless steel, and titanium.
- Avoid drinking alcohol at least 48 hours before the piercing and a few weeks after it until the piercing has healed.
- Sterilize the needle, jewelry, and piercing clamp thoroughly.
- Wash your hands and piercing area with soap. Wear a clean set of gloves for good measure.
- Use a saline solution to clean the piercing area 2-3 times a day and make sure you wash your hands before and after the process.
- Avoid ointments as they are thicker and obstruct the flow of oxygen to the piercing site, making it easier for bacteria to spread.
- Avoid sweat-inducing activities to keep the piercing area sweat-free.
- Cover your face when going outside and wear a sunscreen of minimum SPF 30.
Piercing is a delicate and potentially dangerous process when done at home. Although there are self-piercing kits available and people on the internet make it look easy, it can be complicated. So, it is understandable if you are considering other ways to get your cool new nose piercing. Learn about your alternative options in the next section.
Safe Alternative Methods
If you are unsure about piercing your nose at home, you can consider the following alternatives.
- Visit a reputed professional piercer who has the experience and expertise to safely and accurately perform the piercing. They will also use sterilized equipment and provide proper aftercare instructions. This will minimize the risk of infections or other complications.
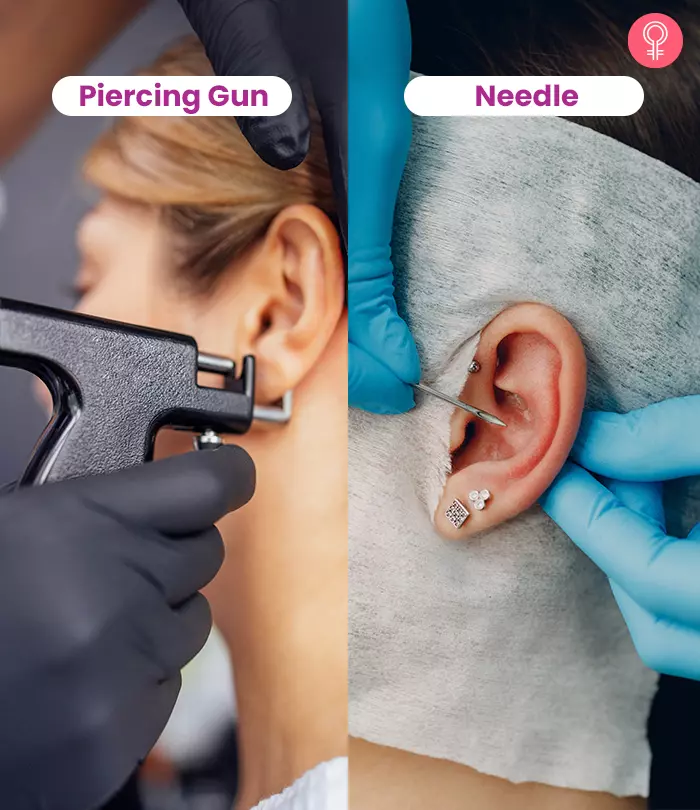
- Consider using a piercing gun at the piercer’s. Salons typically use disposable piercing guns that are sterilized before use. However, it is important to choose a reputable establishment that follows proper hygiene and safety protocols.
- Get your piercing done by a medical professional, such as a dermatologist or plastic surgeon. This option is particularly useful for those with sensitive skin or specific medical skin conditions. The specialists can also provide medical aftercare solutions.
- Try temporary clip-on nose accessories that allow you to switch up your look as you desire without the commitment to a piercing process and its maintenance.
So that was it! We hope this article has, at least in theory, taught you how to pierce your nose at home. The required supplies are easy to procure and the overall procedure is quite straightforward. If you are determined enough, piercing and inserting the jewelry should barely take two minutes. Apart from the step-by-step tutorial, keep in mind that overlooking precautions may lead to infections, allergies, and excessive bleeding. So be mindful and ensure the best hygiene practices such as cleaning your piercing a few times a day, not touching it with dirty hands, and regularly applying aftercare products. Lastly, if you end up with infections or any other issues, seek medical help immediately.
Frequently Asked Questions
Can you hit a nerve while piercing your nose?
Yes. Your nose houses a vast and complicated network of nerves and blood vessels. Accidentally piercing through them not only results in excessive bleeding and a lot of pain, but can also cause lasting nerve damage.
What hurts more: gun or needle nose piercing?
Although the process is much quicker with a piercing gun, anecdotal reports suggest a piercing needle hurts less. The piercing gun apparently exerts too much force and the studs attached to them can also be too blunt to ensure less pain. It may also depend on the skill of the piercer. The more experience they have, the better they know about avoiding nerve endings and executing a quick and clean process.
Piercing your nose at home entails a straightforward process. Watch the following video where a seasoned YouTuber and piercing enthusiast demonstrates how to pierce your nose in a safe and proper manner.
References
Articles on StyleCraze are backed by verified information from peer-reviewed and academic research papers, reputed organizations, research institutions, and medical associations to ensure accuracy and relevance. Read our editorial policy to learn more.
- Body Piercing
https://www.ncbi.nlm.nih.gov/pmc/articles/PMC1496593/ - Risk of Bleeding with Exposure to Warfarin and Nonsteroidal Anti-Inflammatory Drugs: A Systematic Review and Meta-Analysis
https://pubmed.ncbi.nlm.nih.gov/32455439/ - Factors Affecting Wound Healing
https://www.ncbi.nlm.nih.gov/pmc/articles/PMC2903966/
Read full bio of Ikramul Haque Shazib
Read full bio of Aparna Harry
Read full bio of Eshna Das
Read full bio of Joyce Joyson


















Community Experiences
Join the conversation and become a part of our empowering community! Share your stories, experiences, and insights to connect with other beauty, lifestyle, and health enthusiasts.