51 Adorable Short Hairstyles For Black Women To Inspire You
Because it's definitely a great idea to experiment with these cute yet short hairdos.
Image: ShutterStock
Gone are the days when only long, flowing hair grabbed all the attention. On the contrary, short hair is the trend now. Short hairstyles for black women are a great idea, given the coiled texture of their hair. Even the hair care procedure is easy – all you need to do is wash, dry, and style, which can save you a lot of time and hassle. Proving the misconceptions wrong that you can’t “do much” with short hair, plenty of celebs and hairstylists are rocking the gorgeous short hairdos in movies and on social media, respectively.
Mel Marakalala, a blogger, shared her journey with her acceptance of her short hair, and Black hair in general. She felt long hair would make her look like a “woman”. In her blog, she mentions, “I had always generally relied on a cute cut or the cut-and-dye, to make me feel feminine and beautiful about myself .” However, her short hair never stopped her or garnered any negative comments from her family, “We always laugh about it and move on. Hair, or my lack thereof, has never broken me in the slightest (i).”
The fact is that you can style short hair as creatively as long hair. So, in this article, we have listed our top picks for short hairstyles that black women can opt for. Pick one and try it out!
 Before You Get Started
- To maintain the health of your short hair and prevent dryness and breakage, condition it once a week and do hot oil treatment two times a month.
- Do not pull your short hair too tight into braids. It will only weaken your roots and cause hair fall.
- Avoid locking your hair into high ponytail styles for too long as it can cause hair loss.
In This Article
51 Super Sexy Hairstyles For Black Women With Short Hair
- CrownedAfro
- PixieWithBangs
- ClassicTightMohawk
- StraightFrohawk
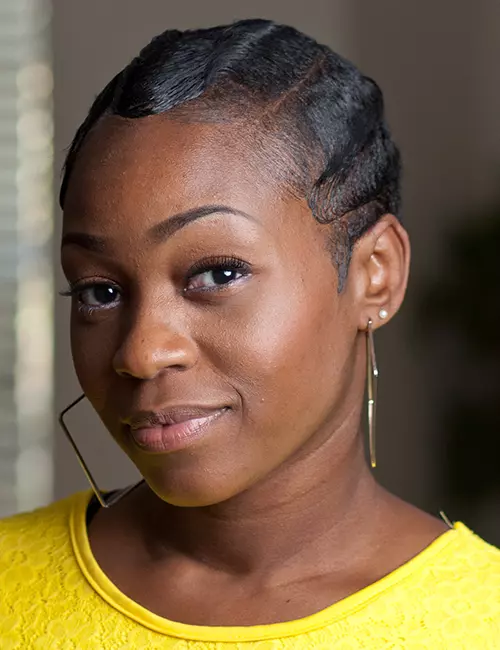
- ClassicFingerWaves
- MicroBraidsWithBangs
- HalfSideCornrows
- CornrowCrown
- BeadedBob
- PulledBackAfro
- PiledUpPony
- Fro-Hawk
- The S Bun
- Twisted Comb Afro
- Pin-Up Bun
- Pompadour
- Chignon Headband
- Curly Twisted Pin-Up
- French Twisted Mini Cornrows
- Curly Front Ponytail
- Jumbo Twisted Ponytail
- Twisted Face Framers
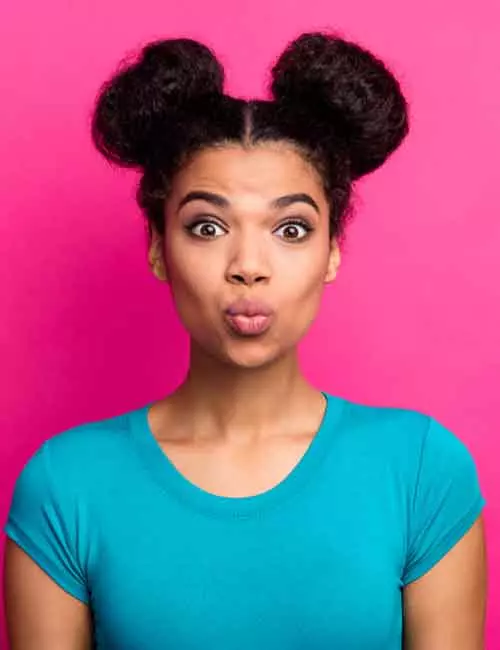
- Cat Ear Buns
- Half Up Bun
- Double Buns
- Flat Twisted Puff
- One Side Pinned Up
- Flat Twist Low Bun
- Dutch Crown Braid
- Floral Hair
- Accessorized Half Bun
- Side Parted Pinned Afro
- Twisted Double Headband
- Center Parted Pinned Afro
- Wrapped Up Afro
- Sleek Center Parted Bun
- Braided Headband Bun
- Super High Top Bun
- Scarf Bow Afro
- Sleek Side Parted Ponytail
- French Twisted Tiara
- Gelled Back Curls
- Side Parted Curls
- Bumped Up Straight Hair
- Messy High Ponytail
- Textured Side Ponytail
- Fancy Headbanded Afro
- French Braided Back
- Side Bangs Ponytail
- The Wide Brimmed Hat Look
- Bowl Cut
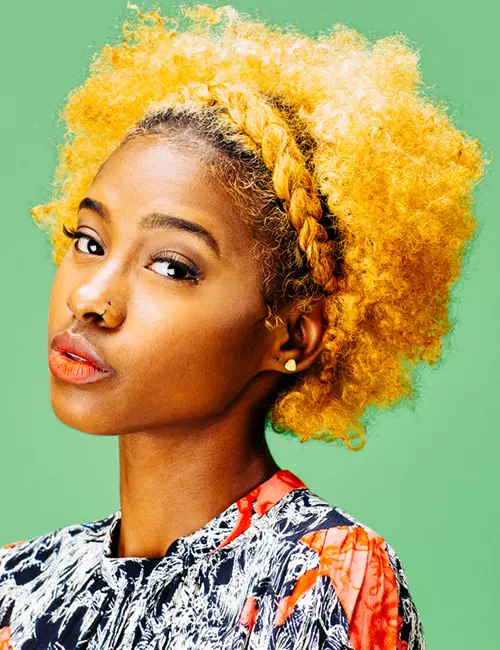
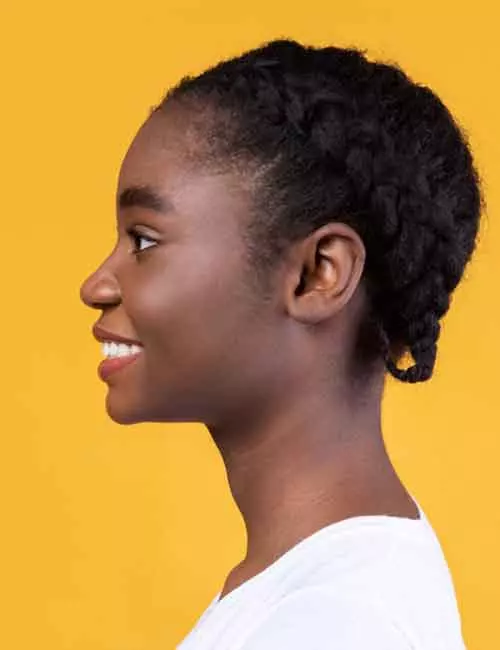
1. Crowned Afro
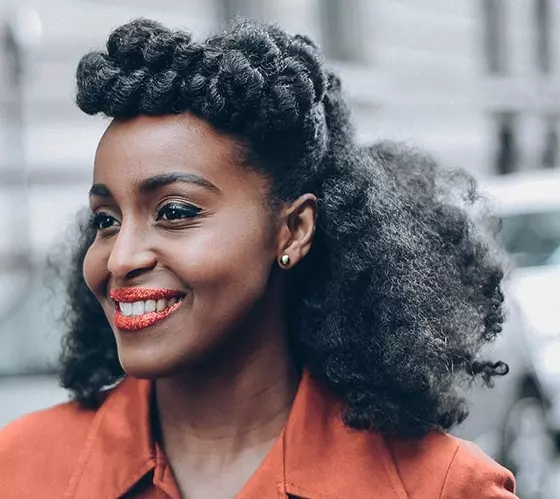
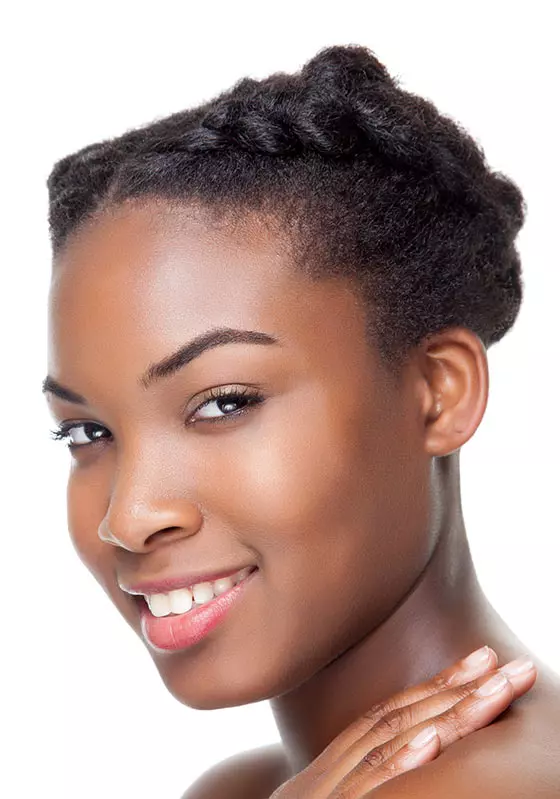
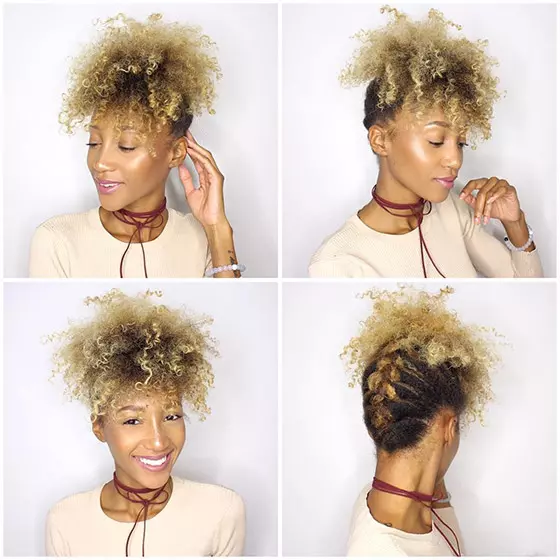
If you are blessed with a regal afro, you need to utilize it to take your hairstyle to the next level. A crowned braid on an afro is an elegant hairstyle that takes only a few minutes to perfect. You can elevate this look by coloring your ‘fro a sunny yellow shade.
What You Need
- Rat-tail comb
- Hair pick
- Hair elastic
- Bobby pins
- Hair cream
How To Style
- Use the hair pick to fluff out your afro.
- Use a rat-tail comb to divide the hair on the crown horizontally from the hair at the back.
- Apply hair cream to the front section of hair.
- Start Dutch braiding your hair from your left ear.
- Once the braid reaches behind your right ear, secure it with a hair elastic and some bobby pins.
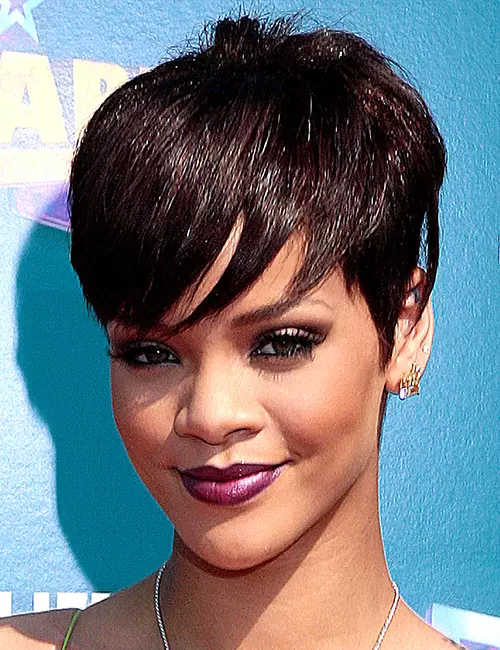
2. Pixie With Bangs
A pixie with bangs offers an ever-so-versatile feminine look to you for any occasion. It also refreshes your look like no other hairstyle. If Rihanna is the one who inspired you to chop off your hair, this is the perfect look to start with. You can style face-framing bangs on a pixie with plenty of ease by sweeping the bangs forward from the crown.
What You Need
- Hair brush
- Blowdryer
- Small round brush
- Heat protectant
- Straightening iron
- Setting spray
How To Style
- Brush your hair to remove all knots and tangles.
- Blowdry the bangs and part time them the way you prefer.
- Apply some heat protectant and straighten your bangs.
- Use your fingers to separate the face-framing sections of bangs.
- Finish off the look with setting spray all over the pixie.
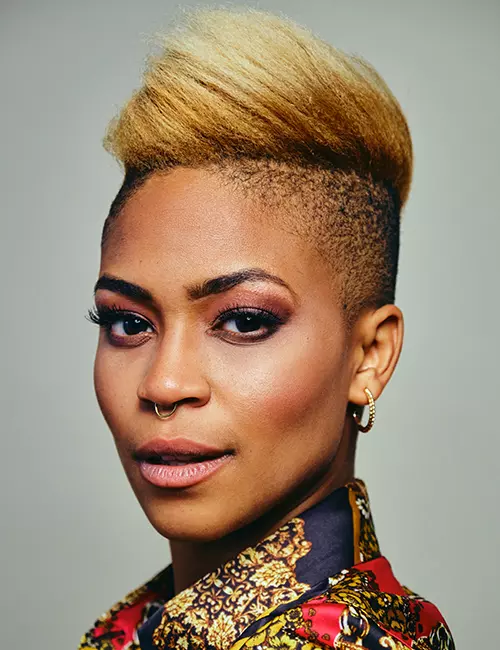
3. Classic Tight Mohawk
The mohawk look is not only for men to show off. It has seen a huge rise in popularity among women in recent years. It is one of the best hairstyles to sport in the summer as you do not have to worry about your hair making your neck sweaty and hot.
What You Need
- Wide-toothed comb
- Blowdryer
- Hair brush
- Heat protectant
- Straightening iron
- Strong-hold hair gel
How To Style
- Wash your hair and use a wide-toothed comb to detangle it.
- Brush down your hair while blowdrying it to straighten it.
- Once your hair is completely dry, apply heat protectant and straighten it.
- Apply strong-hold hair gel and use your hands to style your mohawk any way you like.
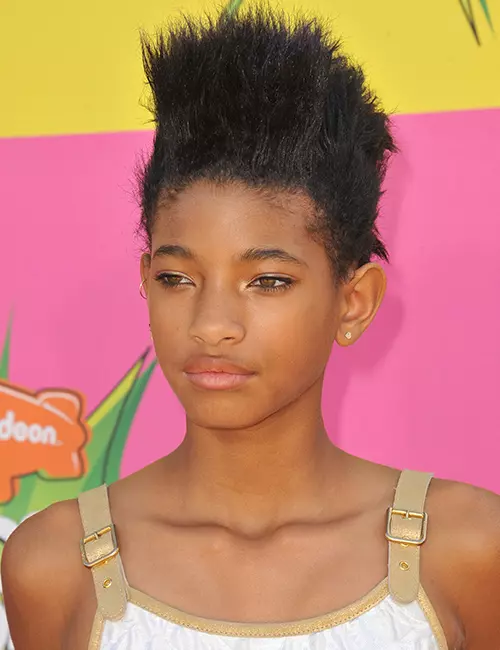
4. Straight Frohawk
If you have a square-shaped face and are willing to take some fashion risks, this is the hairstyle for you. Willow Smith has successfully shown that a straight frohawk is the bold new style statement to make at any event.
What You Need
- Hair brush
- Blowdryer
- Heat protectant
- Straightening iron
- Hair pomade
- Setting spray
How To Style
- Wash your hair and brush it to remove all the knots and tangles.
- Blowdry your hair while brushing it upward.
- Apply heat protectant and straighten your hair tresses.
- Use hair pomade and your hands to make your hair stand on its ends.
- Apply setting spray to hold it in place.
5. Classic Finger Waves
From the 1920s to the 2020s, finger waves are still rocking the world of hairstyles and red carpet events. Be it a retro look or a modern one, you can create versatile looks using finger waves. Just use your fingers and a good quality hair gel to create these chic waves.
What You Need
- Rat-tail comb
- Blowdryer
- Hair mousse
- Hair gel
- Hooded hair dryer
- Setting spray
How To Style
- Wash and blowdry your hair while brushing it down.
- Apply hair mousse all over your hair to make it lay flat against your scalp.
- Apply a generous amount of hair gel.
- Use your fingers and a rat-tail comb to create multiple small S-shapes on the hair.
- Set the waves under a hooded hair dryer.
- Finish off the look with setting spray to hold it in place for a long time.
6. Micro Braids With Bangs
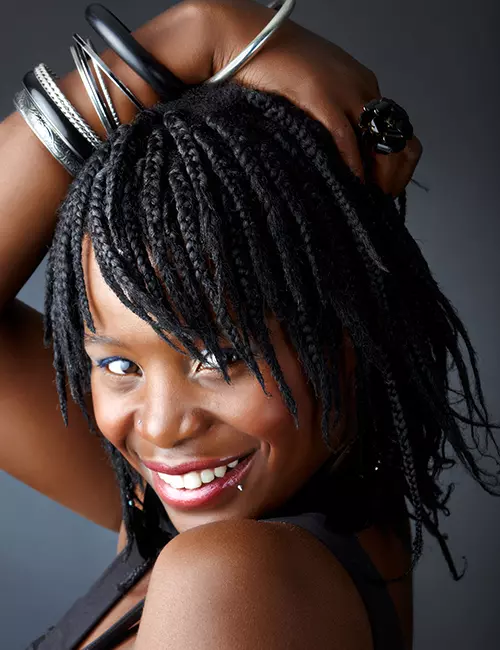
You can enjoy micro braids with bangs by either letting them flow free or tying some braids up with pins or barrettes. The combination of micro braids and bangs makes for a chic and unique look.
What You Need
- Hair wax
- Fine-toothed comb
How To Style
- Start by getting your hair and bangs cut short and braided in micro beads by a professional.
- Apply a bit of hair wax to your edges and lay them against your forehead using a fine-toothed comb.
7. Half Side Cornrows
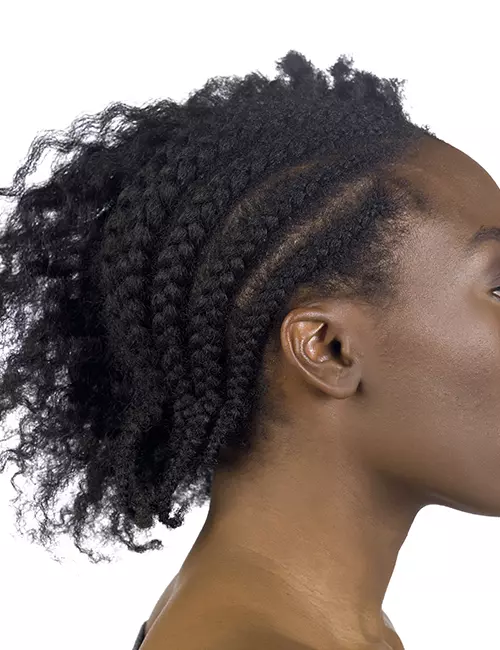
Cornrows are highly suitable for all age groups. You can experiment with different patterns of cornrows to create a look that is personalized for you. This design keeps loose hair on one side and cornrows on the other.
What You Need
- Leave-in conditioner
- Moisturizing cream
- Hair pick
How To Style
- Start by getting the hair on one side of your head braided in cornrows by a professional.
- Wash your hair and apply leave-in conditioner and moisturizing cream to it.
- Twist all the loose hair in small sections and leave them that way overnight.
- Unravel the twists the next morning and use a hair pick to fluff out your curls.
8. Cornrow Crown
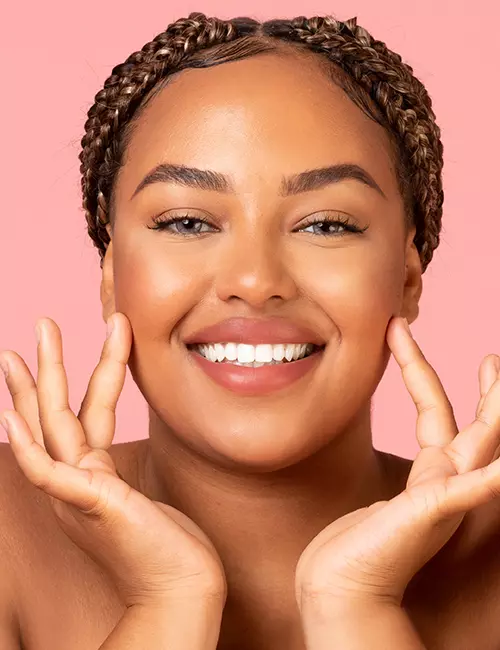
If you want to feel like a princess, a cornrow crown can make you look like one! Go for this cute princessy look to stand out in the crowd the royalty you are. Yes, diamond crowns are great, but who doesn’t love a queen with a natural hair crown?
What You Need
- Hair tie
- Hair pomade
- Fine-toothed comb
How To Style
- Start by getting your hair braided in cornrows by a professional. Ask them to part your hair down the middle and direct your cornrows front to back.
- Gather all the braided ends of the cornrows and tie them in a low bun or ponytail. The pulled-back cornrows will create a crown-like appearance in the front.
- Use some pomade and a comb to lay your edges and finish off the look.
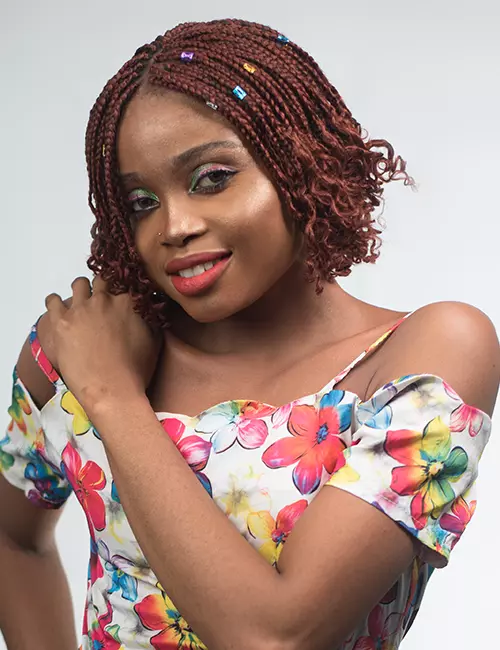
9. Beaded Bob
The best way to transform your look is by getting your braids done in a unique color. These ginger micro braids look adorable in a bob style with curly ends. Accessorize them with colorful beads to match your outfits!
What You Need
- Colorful hair beads
- Hair pomade
- Fine-toothed comb
How To Style
- Get your hair braided in short micro braids by a professional.
- Clip beads onto your braids. You can pick colors based on your outfit or mood.
- Finish off by applying some pomade on your edges and laying them down.
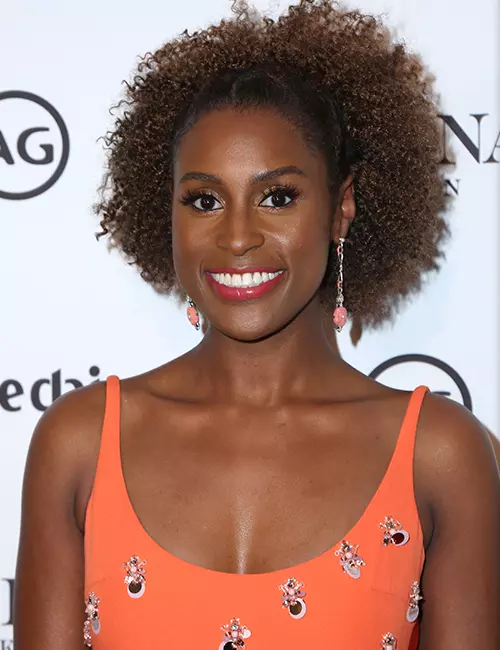
10. Pulled-Back Afro
Make the best out of your afro in a simple elegant way just like actress Issa Rae. This pulled-back afro style can transform your bad hair day into the best hair day in a few minutes!
What You Need
- Hair brush
- Hair gel
- Small-toothed comb
- Hair spray
- Afro hair tie
How To Style
- Apply hair gel to the top half of your hair and slick it back with a brush to make it smooth and flat against your head.
- Now, place and pull back the hair tie till your whole afro is gathered at the back of your head.
- Tie it at the nape of your neck.
- Use hair gel to make the crown and edges look sleek, shiny, and glossy.
Spritz on some hair spray to finish off the look.
11. Piled-Up Pony
I get it. Some days are just ‘Throw your hair in a messy ponytail’ kinda days. But that doesn’t mean you have to resign yourself to looking sloppy. You can still look cute by sporting this ponytail that is piled high with all your naturally gorgeous curly hair falling on your face.
What You Need
- Hair elastic
- Bobby pins
How To Style
- Leaving out your bangs or the hair at the front of your head, gather all your naturally curly hair into a high ponytail.
- Tie the ponytail at the top of your head with a hair elastic.
- Pin down any pieces of hair that you do not like the look of to make your ponytail look exactly the way you want.
- Fluff out your hair and your bangs to add some volume to your style and finish off the look.
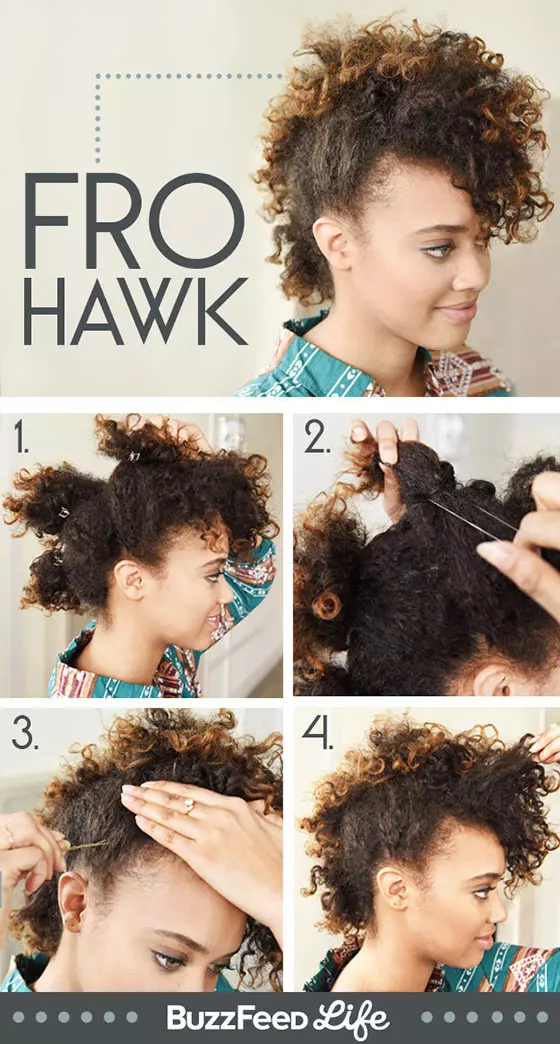
12. Fro-Hawk
Admit it. Every one of us has faced that temptation to shave off half our hair and sport a Mohawk sometime in our life. And the disgusted looks of our parents at even the mention of a Mohawk only added fuel to our determination. Well, you may have chickened out then, but you won’t need to do so now. This faux Mohawk created out of tying up your afro will make all your dreams come true without having to shave off your hair!
What You Need
- Sectioning clips
- Hair elastics
- Bobby pins
How To Style
- From the very front of your head to the nape of your neck, divide all your hair vertically into 4 sections and separate them with sectioning clips.
- Replace the sectioning clips with hair elastics to give some foundation to the hairstyle.
- Pin down any flyaways that you do not like the look of.
- Shake and fluff all 4 sections of hair to make them come together and look like one Mohawk.
 Quick Tip
13. The S Bun
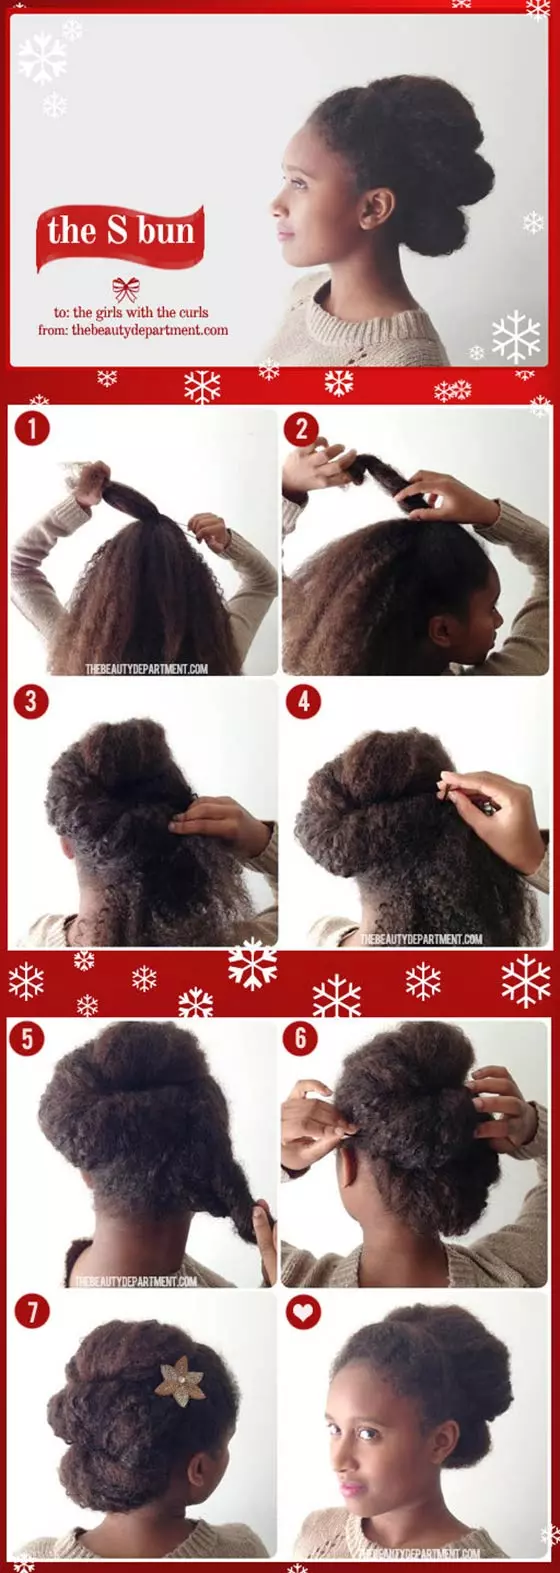
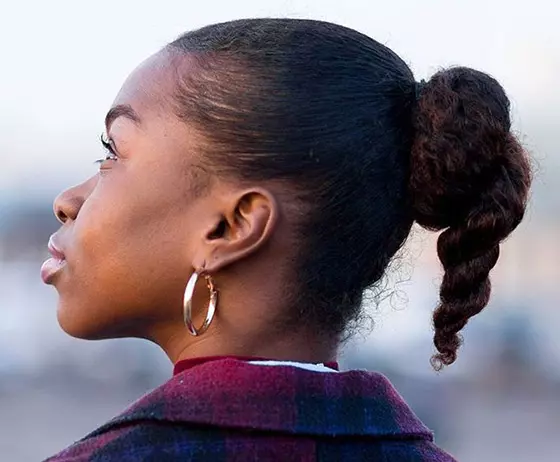
OK, I know the hair pictured above is on the slightly longer side. But this elegant bun hairdo styled in the shape of an S is just as easy, or rather easier, to do on short hair. With the weight of your hair evenly distributed and kept off your neck, this super chic bun is perfect to wear at an outdoor barbecue on a hot summer day or a night out clubbing and dancing.
What You Need
- Hair elastics
- Bobby pins
How To Style
- Tie all the hair at the top of your head with a hair elastic.
- Start twisting this ponytail towards your front left while adding more hair from the left side of your head.
- As you’re twisting, gradually direct your ponytail towards your right ear, while still adding more hair from the back and the right side.
- Secure the end of this twisted ponytail with a hair elastic and pin it down behind your right ear.
- Add more bobby pins along the length of this twisted section to further secure it in place.
- Now gather all the loose hair at the nape of your neck into a low ponytail on your right, twist it right till the end, and secure with a hair elastic.
- Take this twisted section of hair, tuck it under the first section, and pin it behind your left ear.
- Add more pins wherever you feel your bun is insecure and finish off the look.
14. Twisted Comb Afro
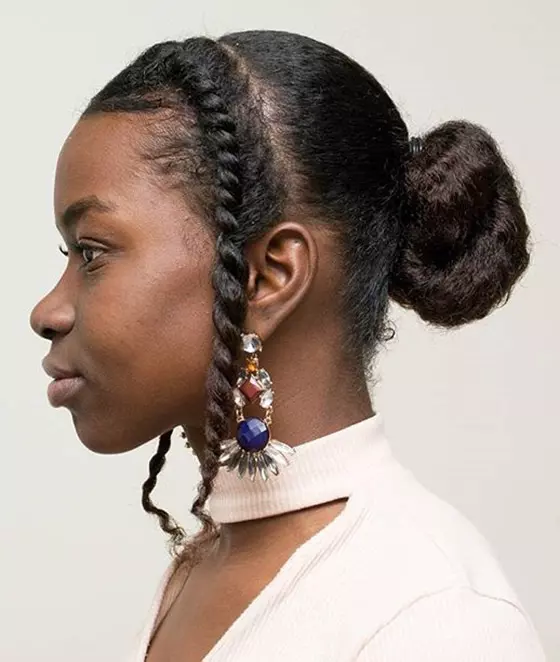
Girl, I know you like snoozing that alarm every morning and getting ready at the very last minute. But don’t you worry because I’ve got your back. You just need a couple of hair combs, and you’ll be ready for work in 5 minutes flat.
What You Need
- Wide toothed comb
- Bobby pins
- Hair brush
- Hair comb accessories
How To Style
- Pick out your curls and fluff them out as much as possible with the help of a wide toothed comb. This will add volume to your afro.
- Pick up a 2 inch section of hair from near your left temple and divide it into 2 sections.
- Twist the right section once towards the right and flip it over the left.
- Keep repeating the previous step over and over again until you have twisted that section of hair till the very end.
- Secure at the end with a hair elastic.
- Create a few more twisted braids the same way right next to the first one.
- Place all the twisted sections across your head, remove the hair elastics holding them, and secure them down to your head with the help of bobby pins.
- Brush the hair above one ear in an upwards direction to smooth it down.
- Secure this brushed up hair with a hair comb.
- Repeat steps 8 and 9 on the same side, but at the back of your head.
- Fluff out your afro one last time with a wide toothed comb to finish off the look.
15. Pin-Up Bun
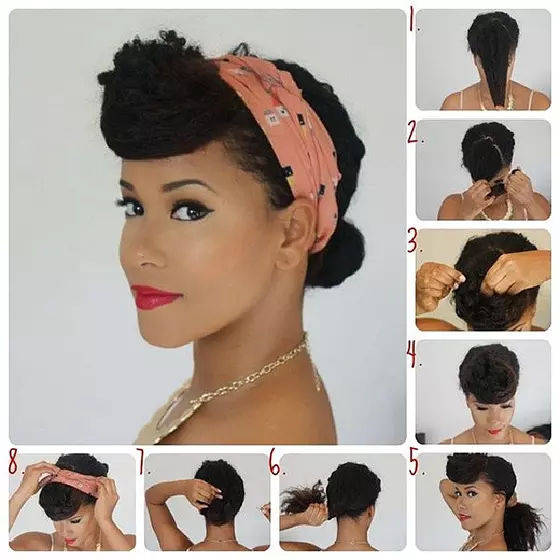
Going for a retro vibe with your hair look? We’ve got you covered! Try out this simple low bun style that will take you literally 5 minutes to do. Once you’re done putting your hair up, all you need is a pretty cloth scarf to top off your totally cute pin-up look!
What You Need
- Bobby pins
- Hair elastics
- Cloth scarf
How To Style
- Section off all the hair at the front of your head and tie a low ponytail with the hair at the back.
- Pick up the hair at the front and start rolling it into a loose bun right above your forehead, continuously securing it with bobby pins.
- Once you’ve rolled your hair completely, tuck the end into the center of your bun and pin it in place.
- Now, twist your ponytail at the back right till the end and roll it up into a bun.
- Secure the bun to your head with the help of bobby pins.
- Place your cloth scarf around the crown of your head and tie it up right behind your bun at the top to finish off the look.
16. Pompadour
Pompadours seem like such a tricky style to perfect. They look like they require an ungodly amount of product and bobby pins to create. But with this easy hack, you will be able to create a pompadour within minutes! Just follow the instructions below if you don’t believe me.
What You Need
- Sectioning clip
- Bobby pins
- Smoothening serum
How To Style
- Section off all the hair at the front of your head.
- Pick up a 2 inch section of hair from near your left temple, pull it back, and pin it at the back of your head.
- Repeat the previous step on the right side.
- Repeat steps 2 and 3 till half your hair at the back has been pinned down.
- Divide the loose hair left at the nape of your neck into 2 sections.
- Intertwine them with each other, tuck them under the pinned hair and secure them in place with the help of bobby pins.
- Unclip the hair at the top and twist it until its base starts to buckle under.
- Tuck the tail of your twisted hair under the buckled base and pin it in place.
- Apply a couple of drops of smoothening serum to your pompadour to give it a sleeker look.
 Quick Tip
17. Chignon Headband
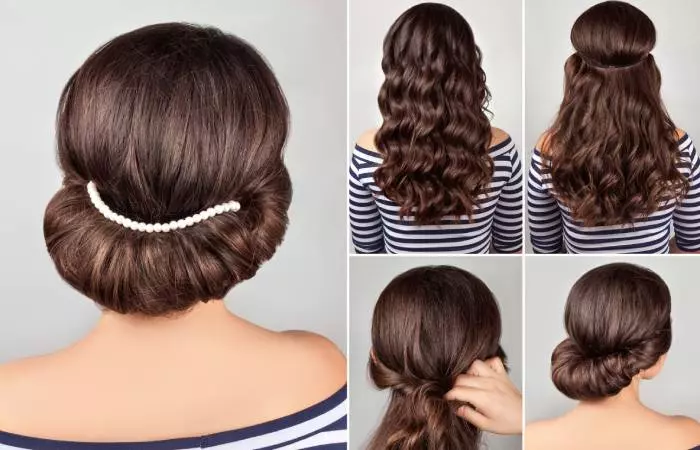
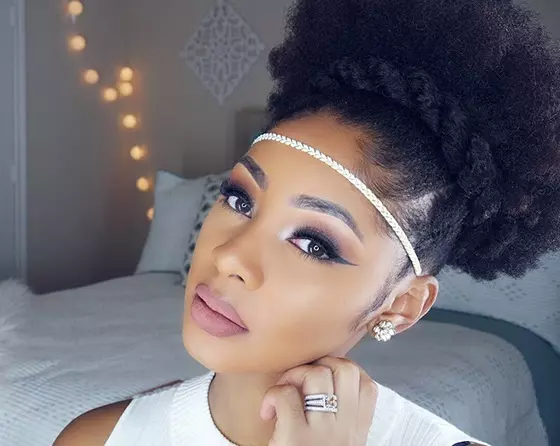
It’s amazing how a simple elasticated headband can help to create an exceptionally beautiful updo. This twisted chignon hairstyle gives off some serious Grecian goddess vibes. And if you want to look like the human embodiment of Aphrodite on your wedding day, this is the hair look you need to go for.
What You Need
- Texturizing spray
- Elasticated headband
- Bobby pins
- Smoothening serum
How To Style
- Prep your hair with a few spritzes of texturizing spray.
- Put on your elasticated headband around the crown of your head.
- Pick up a 2 inch section of hair from near your left temple, flip it over and then tuck it under your headband.
- Now add more hair to that first section of hair and keep repeating step 3 until you have reached the back of your head.
- Repeat steps 3 and 4 on the right side.
- Tuck all the hair left at the back of your head into the headband and secure it with bobby pins.
- Rub some smoothening serum between your palms and run them over your hairdo to reduce any frizz and give the do a more polished look.
18. Curly Twisted Pin-Up
It’s edgy, it’s cute, and it’s just the style for you! Especially if you have weirdly textured curls that frizz up and don’t have any definition. In that case, flexi rods are your best friend. Curl your hair with those magical tools and twist up your hair to get this look that is perfect for a night out at a concert.
What You Need
- Tail comb
- Bobby pins
- Flexi rods
Hair styling gel
How To Style
- Horizontally part your hair from ear to ear and section away all the hair at the front with a hair elastic.
- Vertically part all the hair at the back down the center.
- From the left section, pick up a 2 inch section of hair from the nape of your neck and divide it into 2 sections to French twist it.
- Twist your left section once to the left and flip it over the right section, each time adding more hair on either side.
- Once you have run out of hair to add to your French twisted braid, secure it at the top with a hair elastic.
- Repeat step 3 to 5 on the right section of your hair.
- Remove the hair elastic from the hair sectioned away at the top.
- Insert flexi rods into all this hair by picking up 1 inch sections at a time and wrapping them from the ends of your hair till your roots and bending the rod to secure it in place.
- Leave the flexi rods in your hair overnight.
- The next morning, remove the flexi rods and apply a bit of styling gel along the edges to smoothen them down and finish off the look.
19. French Twisted Mini Cornrows
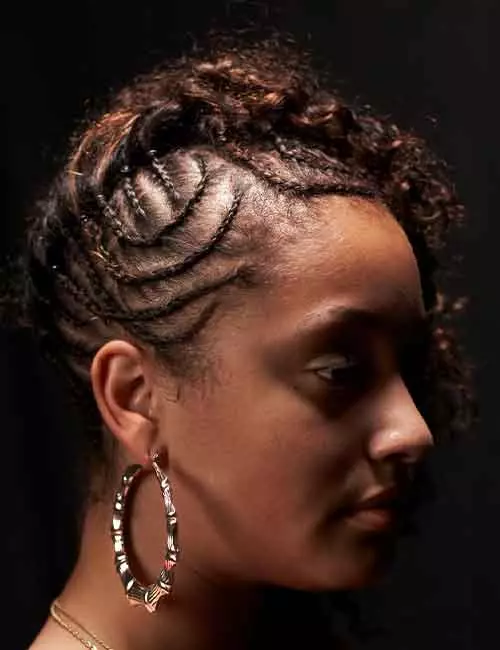
Create magic with this cute ass semi cornrows style that you can wear for a couple of days straight without much touching up. This style is especially for those people out there who can’t commit to a full head of cornrows but still want to add a bit of edge to their look. Try this style out and thank us later.
What You Need
- Moisturizing hair cream
- Bobby pins
- Light hold hairspray
How To Style
- Part your hair on one side.
- From the side with less hair, pick up a ½ inch section of hair from right next to your parting.
- Split this section of hair into 6-7 parts and French twist it.
- To do so, twist your right section towards your right and flip it over your left section, adding more hair to it each time you twist.
- Once you have French twisted for about 3 inches, secure it in place with the help of bobby pins.
- Keep repeating steps 2 to 4 until all the hair on that side of your parting has been French twisted and pinned in place.
- Finish off the look with a few spritzes of light hold hairspray.
20. Curly Front Ponytail
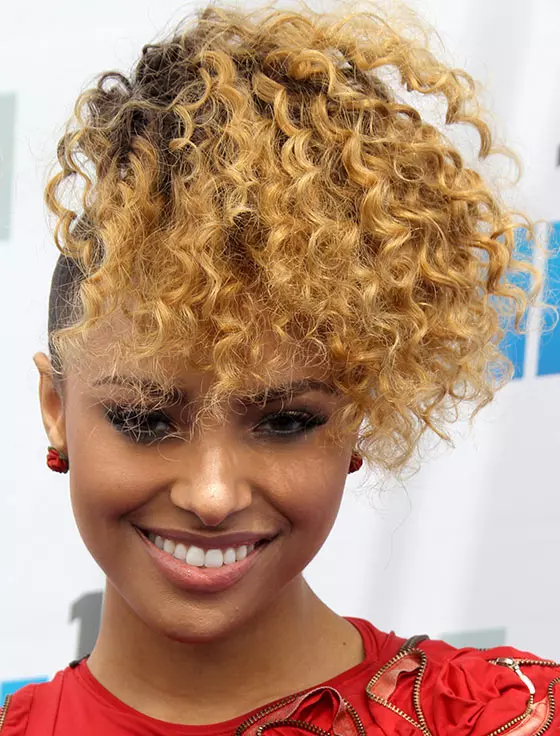
Kat Graham strikes again with a fresh and totally unconventional hair look. This front ponytail style puts a completely new twist on the classic ponytail look by simply changing its positioning. It’s quirky and definitely bound to step your style statement up a notch.
What You Need
- Curl cream
- Hair styling gel
- Hair brush
- Hair elastic
- Wide toothed comb
How To Style
- Apply curl cream to your hair to give some definition to your natural curls.
- Brush all your hair to the front of your head so that they hang in front of you.
- Apply a generous amount of hair styling gel to all your hair at the back.
- Now, brush all that hair at the back up and towards the front of your head, to sleek them down as much as you can.
- Gather all your hair and tie it into a ponytail right above your forehead.
- Use a wide toothed comb to pick out your curls and fluff up your ponytail to finish off the look.
21. Jumbo Twisted Ponytail
Listen up, ladies. Ponytails don’t just have to be just ponytails. With a little bit of creativity, they can be much more involved and intricate in style. This jumbo twisted version of this classic style is a perfect example of incorporating some twists to revamp a basic hairstyle.
What You Need
- Moisturizing hair cream
- Fine toothed comb
- Hair elastics
How To Style
- Apply moisturizing cream all over your hair and slick it back with the help of a fine toothed comb.
- Tie all your hair into a high ponytail.
- Divide your hair into 2 sections.
- Twist the 2 sections of hair with each other and secure them at the end with a hair elastic.
22. Twisted Face Framers
If you’re someone who loves styling her hair and coming up with new looks, you need to be open to some experimentation. Check out this twisted hairstyle that perfectly frames the model’s face. It may take some getting used to but, boy, does it look cute!
What You Need
- Hair wax
- Hair elastics
- Bobby pins
- Light hold hairspray
How To Style
- Section off all the hair at the front, from ear to ear.
- Tie the hair at the back into a ponytail.
- Twist your ponytail and roll it up into a bun.
- Secure the bun to your head with the help of bobby pins.
- Apply some hair wax to all the hair at the front and part it down the middle.
- From the left side of your part, pick up a 1 inch section of hair and split it into 2 sections.
- French twist these 2 sections of hair by the right section once towards the right and flipping it over the left section.
- Keep adding more hair to this twisted braid each time you twist.
- Once you have run out of hair to add, simply twist the 2 sections of hair with each other and secure it at the end with a hair elastic.
- Repeat steps 6 to 9 on your right side.
- Finish off with a few spritzes of light hold hairspray to complete the look.
23. Cat Ear Buns
Were you one of those adorable kids who loved to pretend she was a cat and went around on all fours and meowed at everything? Well channel that inner child of yours now and sport these cat ear buns that look super cute and, surprisingly, not silly at all!
What You Need
- Hair elastics
- Bobby pins
- Wide toothed comb
How To Style
- Part your hair down the middle.
- Pick up a 3 inch chunk of hair from the left side of your parting and tie into a ponytail at the top of your head.
- Repeat the previous step on the right side.
- Roll your left ponytail into a bun and secure it to your head with the help of bobby pins.
- Repeat step 4 on the right side.
- Gently pull apart the buns to make them look fuller.
- Use a wide toothed comb to fluff out and volumize your hair and finish off the look.
24. Half Up Bun
There’s something unconventional and almost daring about a half bun, isn’t there? The way it swoops up and sits elegantly atop our head, leaving half your hair to flow loosely down is absolutely stunning. Sport this look when you want to wow your date and you won’t be disappointed.
What You Need
Bobby pins
How To Style
- Pick up all the hair right at the top of your head.
- Roll it into a bun and secure it to your head with the help of bobby pins.
- Tug and pull at the bun to make it look more voluminous and big and finish off the look.
25. Double Buns
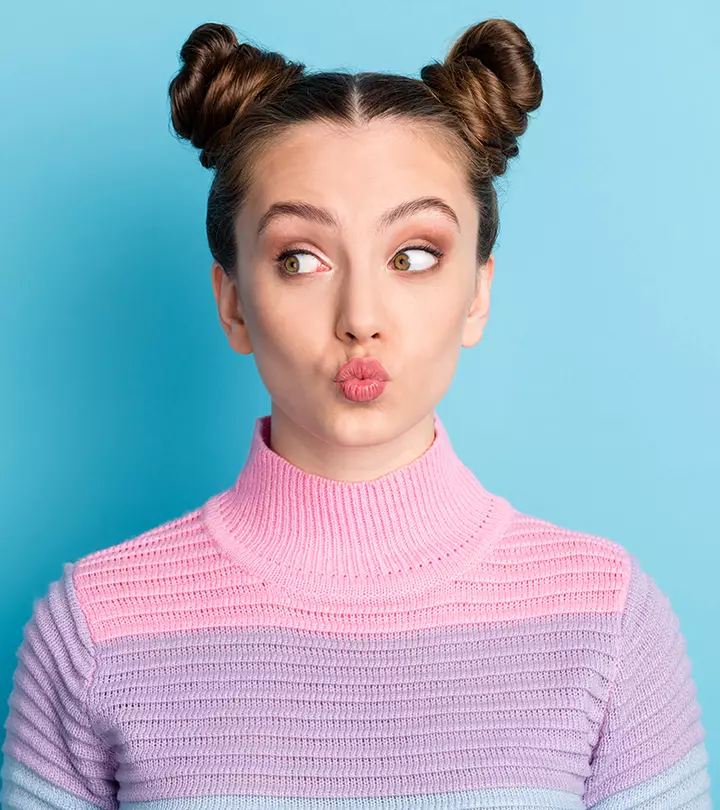
Are you an athlete? Are you constantly on the lookout for hairstyles that you can wear that can keep your hair out of your face when you play? Do you still want to look cute? The answer to all these questions is this insanely adorable double buns look.
What You Need
- Hair elastics
- Bobby pins
How To Style
- Part your hair down the middle
- Continue parting your hair till the nape of your neck to divide all your hair into 2 sections.
- Pick up the right section of your hair and tie it into a high side ponytail.
- Roll up this ponytail into a bun and secure it to your head by inserting bobby pins into it from all sides.
- Repeat steps 3 and 4 with the left section of your hair.
- Pull apart and loosen your buns to make them look bigger and finish off the look.
26. Flat Twisted Puff
Weddings are stressful. Dresses, makeup, flowers, jewelry, guest lists, catering, décor…the list is endless. Well, why don’t you let me strike one thing off that list? Your hairstyle, of course! This fluffed up afro adorned with a thick band of twisted hair will add an elegant touch to your look while still remaining stylishly on point.
What You Need
- Hair brush
- Hair styling gel
- Hair control paste
- Long satin band
- 8 strands of Marley hair extensions
- Bobby pins
How To Style
- Start off by brushing out your hair to detangle it. Fluff it up.
- Carefully part and pick up a 1 inch section of hair from above your left ear and apply some styling gel to it.
- Pick up the first few strands of the section, from right near your hairline, and split them into 2 sections.
- Flat twist those 2 sections by adding more hair to it from the sectioned off hair each time you twist them.
- Once your flat twist has gone past your ear, simply twist them right till the end and secure the end with a hair elastic.
- Repeat steps 2 to 5 on the right side.
- Now, apply a generous amount of control paste all along your hairline and brush the hair on your edges down to make them lie as flat as possible.
- Wrap your satin band along your hairline, around all your hair, and tighten it until all your hair is in a big puff.
- Tie the ends of the band at the back of your head.
- Fold your Marley extension in half so that you end up with 2 sections.
- Twist the 2 sections together and secure them at the end with a hair elastic.
- Place the twisted Marley extensions around the satin band in your hair and secure them at the back of your head with some bobby pins.
- Brush and fluff up your hair to create more volume and finish off the look.
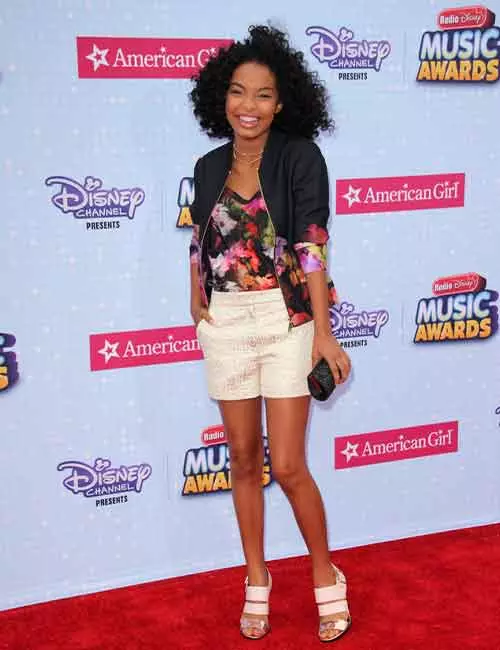
27. One Side Pinned Up
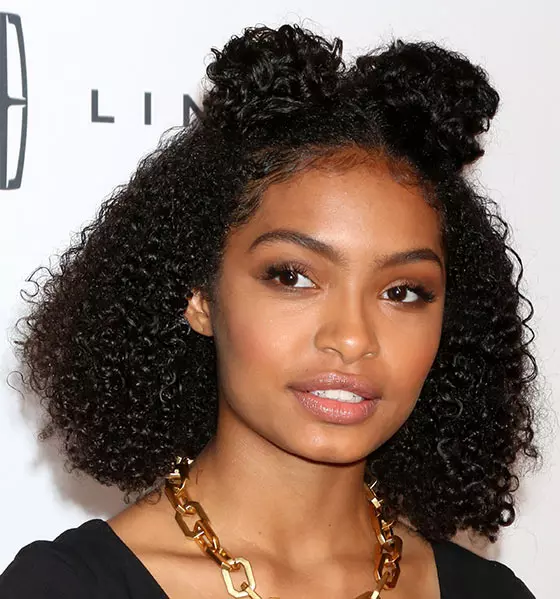
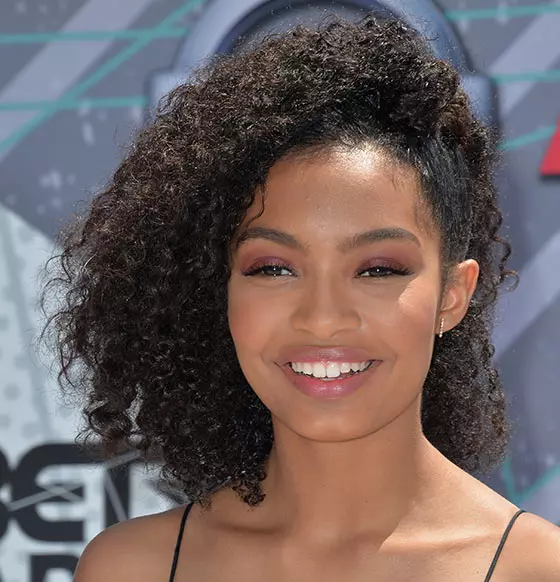
Get ready for that much-awaited pool party in style with this chic one side pinned up look sported by teen icon Yara Shahidi. This uber stylish hairstyle takes less that 3 minutes to perfect and pairs beautifully with denim shorts and swimsuits!
What You Need
- Hair styling gel
- Fine toothed comb
- Bobby pins
- Wide toothed comb
How To Style
- Part your hair deeply on one side.
- On the side of the parting with lesser hair, apply some styling gel on all the hair above your ear.
- Start combing all the gelled hair in an upwards direction, towards your parting.
- Once you have gotten that hair to lay flat against your head, secure it with bobby pins right next to your parting.
- Fluff out your curls with a wide toothed comb to finish off the look.
28. Flat Twist Low Bun
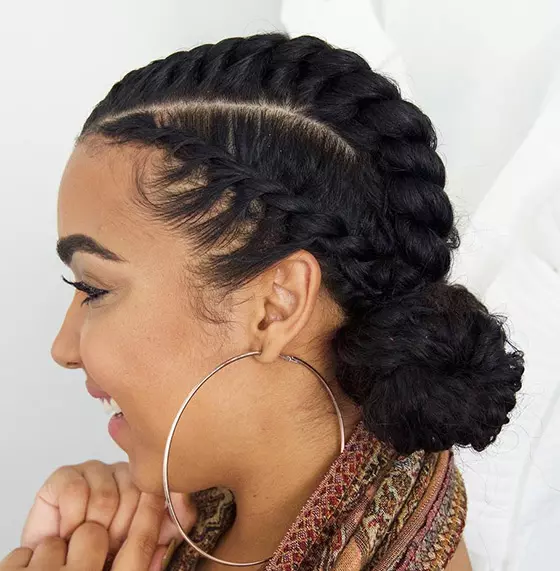
Your pursuit to look fun and flirtatious ends right here with this low bun look! I mean why would you want to sleek back and tie your bun in a boring manner when you can add some flat twists to make your style look oomphalicious?
What You Need
- Hair brush
- Tail comb
- Sectioning clips
- Hair styling gel
- Hair elastics
- Bobby pins
How to Style
- Brush out your hair to remove any knots and tangles.
- With a tail comb, carefully part your hair from your left temple till the nape of your neck and section it away with the help of sectioning clips.
- Repeat the previous step on the right side.
- Pick up the middle section of hair that is left loose and apply styling gel all over it.
- Pick up a small section of hair from the very front of your middle section and split it in 2.
- Flat twist those 2 sections of hair by adding more hair to it from the middle section each time you twist.
- Once your flat twist has reached the nape of your neck, simply twist it till the end and secure with a hair elastic.
- Repeat steps 6 and 7 on the left and right sections of your hair.
- Roll the tails of your 3 flat, twist together into a bun and secure it to your head with bobby pins.
29. Dutch Crown Braid
Give yourself the royal treatment that you deserve with this crown braid style that is sure to make many heads turn. This braided style is particularly great to do on days that you don’t feel like washing your hair but still need to look presentable.
What You Need
- Hair brush
- Sectioning clip
- Water in a spray bottle
- Hair elastics
- Bobby pins
How To Style
- Brush out all your hair to remove all knots and tangles.
- Starting from your left temple, part your hair till the center of the nape of your neck, and section it away with a sectioning clip.
- Spritz some water on all the hair on the right side of your parting to dampen it.
- Pick up a 2 inch section of hair from right next to your parting and split it into 3 strands.
- Dutch braid these 3 strands by adding more hair into the braid with each subsequent stitch of braiding.
- Once your Dutch braid has reached the nape of your neck, simply braid it the rest of the way down and secure it with a hair elastic.
- Repeat steps 3 to 6 with the left section of your hair.
- Place the tails of both your braids flat on your head and secure them down with bobby pins.
- Gently pull at your Dutch braids to give them a fuller look.
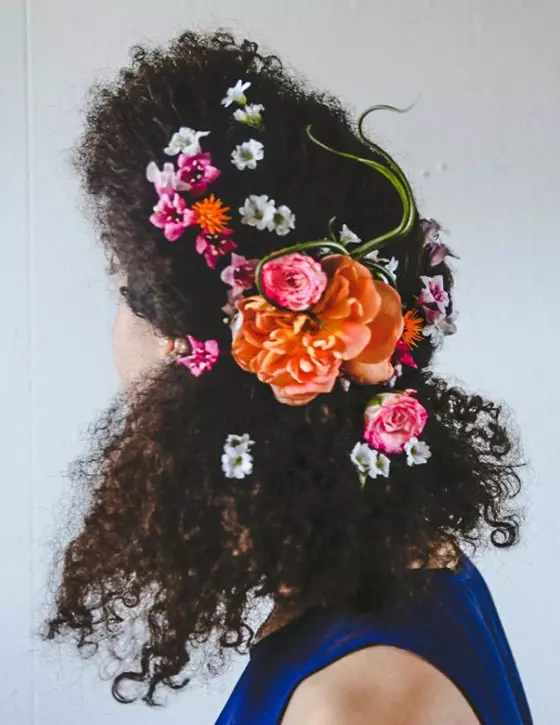
30. Floral Hair
Look like a forest pixie flitting about in the wilderness by sporting this enchanting hair look embellished with an assortment of flowers. All you need to do is take a stroll in your garden (or at your local flower shop) and pick up the flowers that will complement your outfit. Stick them in your hair and you’re done!
What You Need
- Bobby pins
- Fresh flowers
How To Style
- Part your hair on one side.
- Pick up a big chunk of hair from one side, twist it while adding more hair into it, and secure it at the back of your head with some bobby pins crisscrossed over each other.
- Repeat the previous step on the other side.
- Cut off the stems of your flowers until they are about 2 inches long.
- Place your flowers in your hair and pin them down if your curls are not enough to hold them in place.
31. Accessorized Half Bun
A true princess like you deserves to wear a tiara. So whip out that gorgeous bun pin of yours, throw your hair into a half top bun, and put on your bun pin to give yourself the royal treatment you deserve. It is especially recommended to sport this style on a first date to make sure your date knows your worth.
What You Need
- Hair elastic
- Fancy bun pin
How To Style
- Pick up all the hair at the top of your head and tie it into a ponytail.
- When you are twisting your hair elastic the last time around your hair, do not pull your ponytail all the way through so as to create a bun.
- Pull and stretch out your bun gently to give it a fuller look.
- Insert your bun pin into the front side of your bun to finish off the look.
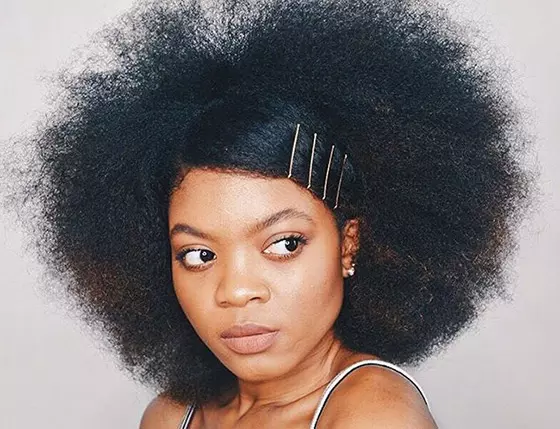
32. Side Parted Pinned Afro
One can never go wrong with this natural hairstyle for short hair. A gorgeous study in contrasts is exactly what you get when you look at this hairstyle. The voluminous and unrestrained afro at the back is offset by the sleek pinned down hair at the front. Sport this style at a college party or a night out clubbing and there’s no way that you won’t be the center of attention.
What You Need
- Hair brush
- Wide toothed comb
- Styling gel
- Bobby pins (gold colored)
How To Style
- Fluff out your hair with a hair brush.
- Use a wide toothed comb to pull and comb out your hair and create an afro.
- Part the hair in the front on one side.
- From the side of your parting with more hair, pick up a big chunk of hair.
- Apply some styling gel to it to make it lay flat against your head.
- Pin that section of hair behind your ear.
- Insert four bobby pins parallel to each other into that section of hair to finish off the look.
33. Twisted Double Headband
Those pin-up models look great, don’t they? But, here’s the thing, you don’t have to dress up all sexy to look like one. Try out this captivating half up pin-up do that makes use of some simple twisted braids to make you like the girl of everyone’s dreams.
What You Need
- Hair brush
- Water in a spray bottle
- Hair elastics
- Bobby pins
How To Style
- Brush out all your hair to remove any knots and tangles.
- Part your hair deeply on one side.
- Pick up a 3 inch section of hair from right in the front, split it into 2 sections, and spray it with water to dampen it.
- Twist the left section towards your right once and flip it over the right section.
- Keep repeating the previous step until you’ve twisted right till the end. Secure with a hair elastic.
- Pick up a 3 inch section of hair from right behind the first twisted section and repeat steps 3 to 5.
- From near your ear, repeat this twisting process with 2 more sections of hair.
- Place the first 2 twisted sections across your head and pin them down behind your ear.
- Flip the second 2 twisted sections over the first 2 sections and pin them down at the back of your head.
34. Center Parted Pinned Afro
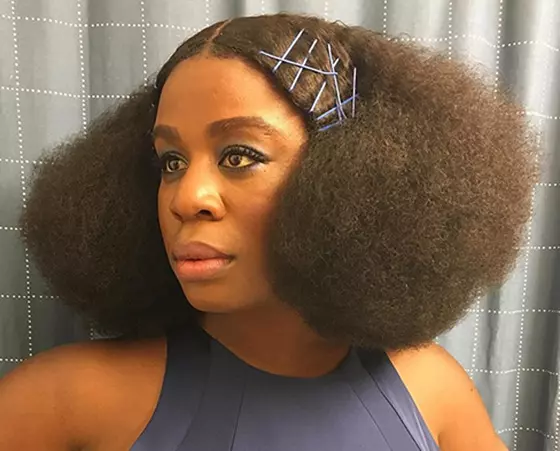
Turns out Uzo Aduba is not just a multiple award-winning actress but also a complete hair goddess. In this epic afro hairstyle, Aduba has parted and sleeked her hair down the middle and added a vibrant pop of color with some cobalt blue toned bobby pins to look red-carpet ready.
What You Need
- Hair brush
- Wide toothed comb
- Hair styling gel
- Colorful bobby pins
How To Style
- Fluff out your hair with a hair brush.
- Use a wide toothed comb to pull and comb out your hair and create an afro.
- Part the hair in the front down the middle.
- From one side of your parting, pick up a big chunk of hair.
- Apply some styling gel to it to make it lay flat against your head.
- Pin that section of hair behind your ear.
- Insert booby pins in a haphazard pattern in that section of hair at the front.
- Repeat steps 5 to 7 on the other side to complete the look.
35. Wrapped Up Afro
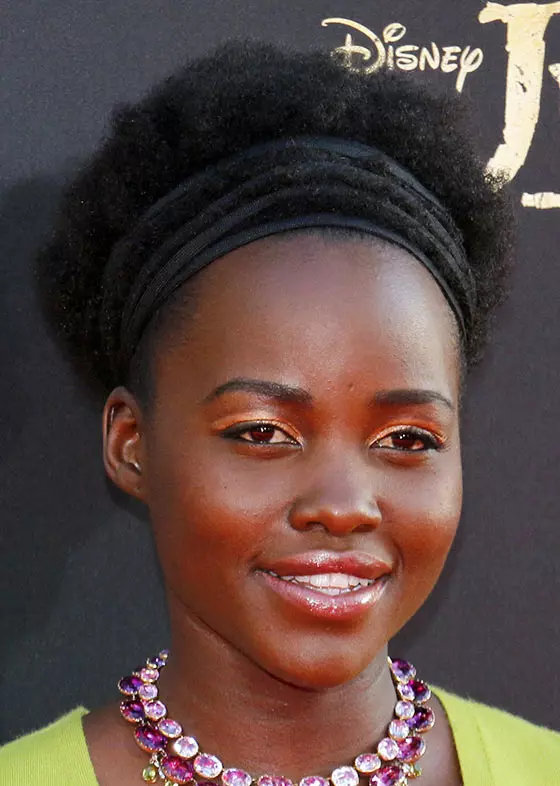
You know a hairstyle is worth trying out when Oscar-winning actress (and an all-round awesome person) Lupita Nyong’o sports it on a movie premier red carpet. This simply wrapped up afro look simply requires a long satin band to elevate an otherwise bright and vibrant outfit.
What You Need
- Hair brush
- Hair control paste
- Fine toothed comb
- Long satin band
How To Style
- Brush out your afro to give it as much volume as possible.
- Apply control paste all along your hairline and comb back your hair to make your edges lay flat against your head.
- Leaving one end of your satin band near one of your ears, place it along your hairline at the very front of your head.
- Wind the band around your head and when you have reached the front of your head again, place it half an inch behind where you placed it first, making sure that some of your hair pokes out from under it.
- Keep repeating the previous step until your band is completely wrapped around your head and tie the ends together.
36. Sleek Center Parted Bun
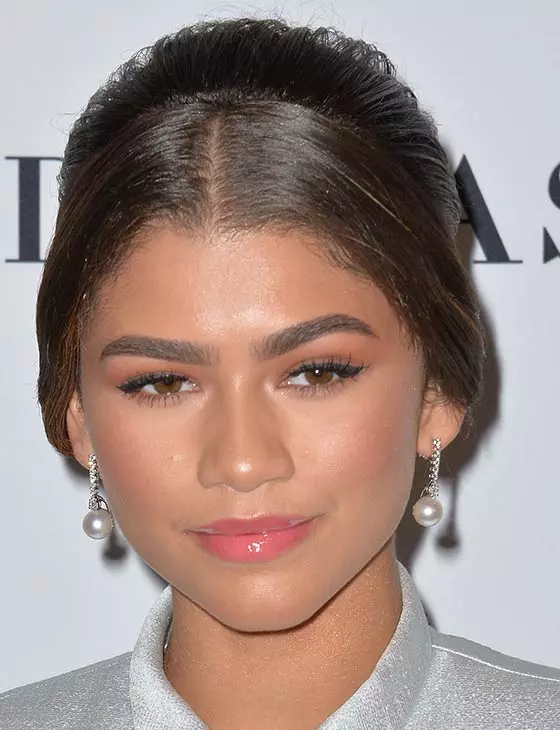
Be the picture of elegance and dignity with this simple center-parted bun. Just straighten and sleek down your hair before putting it up in a bun to make a classically gorgeous style statement. And, honestly, if a style is Zendaya-approved, you don’t even need to question it.
What You Need
- Heat protectant
- Straightening iron
- Fine toothed comb
- Hair elastic
- Bobby pins
How To Style
- Prep your hair with some heat protectant.
- Picking up 1 inch sections of hair at a time, straighten all your hair.
- Part your hair down the middle.
- Leaving your parting around 2 inches long, comb back all your hair and tie it into a low ponytail.
- Roll up your ponytail into a bun and secure it to your head with some bobby pins.
- Gently loosen the hair above your ears and the top of your head to give your hairdo some volume and create a softer look.
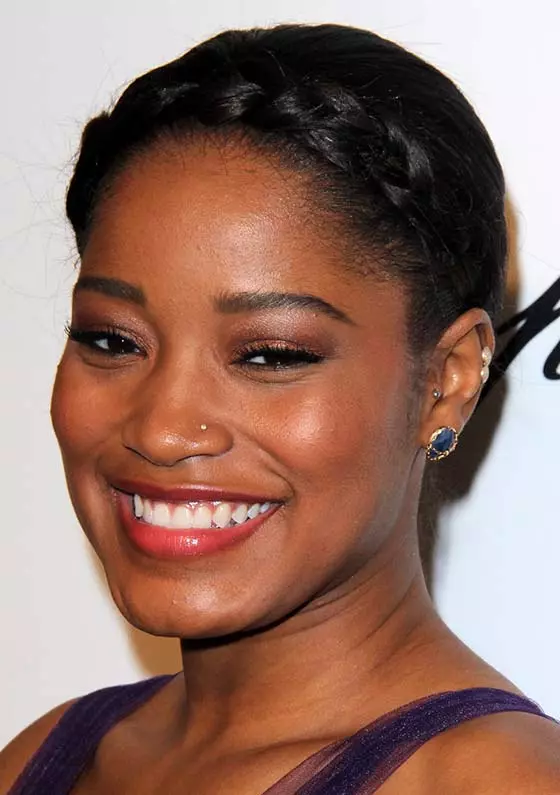
37. Braided Headband Bun
The best part about working with your natural hair is that no matter what intricate braided style you put it up in, you know that it won’t slip out of place or unravel. Keke Palmer has put her hair to this test by sporting this neat braided headband look that pairs perfectly with her simple purple tulle gown and blue stud earrings.
What You Need
- Hair moisturizing cream
- Hair brush
- Hair elastic
- Bobby pins
- Light hold hairspray
How To Style
- Apply some moisturizing cream all over your hair and sleek back all your hair with the help of a hair brush.
- Pick up a 3 inch section of hair from near your left ear.
- Braid this section of hair right till the end and secure it with a hair elastic.
- Place this braid along the top of your head and pin it behind your right ear.
- Insert some more bobby pins along the length of the braid to prevent it from slipping out of place.
- Gather the rest of your hair into a low ponytail.
- Roll the ponytail into a bun and secure it to your head by inserting bobby pins into it from all directions.
- Spritz on some light hold hairspray to finish off the look.
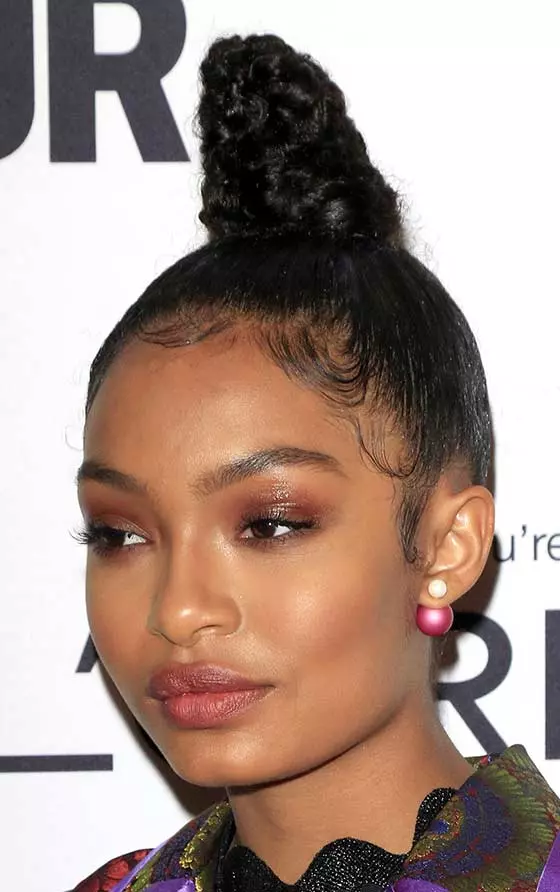
38. Super High Top Bun
If you’re one for trying out unconventional hairstyles, take a page out of Yara Shahidi’s look book. This super high top bun will add a lot of height to your structure. Sleek down the edges and step up your bun tying game to get on Yara’s level of cool.
What You Need
- Hair moisturizing cream
- Hair brush
- Hair styling gel
- Hair elastics
- U-pins
- Bobby pins
- Toothbrush
How To Style
- Apply moisturizing cream all over your hair and sleek it back as much as possible using a hair brush.
- Gather all your hair into a ponytail right at the very top of your head.
- Braid your ponytail and secure the end with a hair elastic.
- Roll the braid into a super high bun and secure it with the help of U-pins and bobby pins.
- Put a small amount of styling gel on a toothbrush and run it along your hairline to make your edges lay flat against your head.
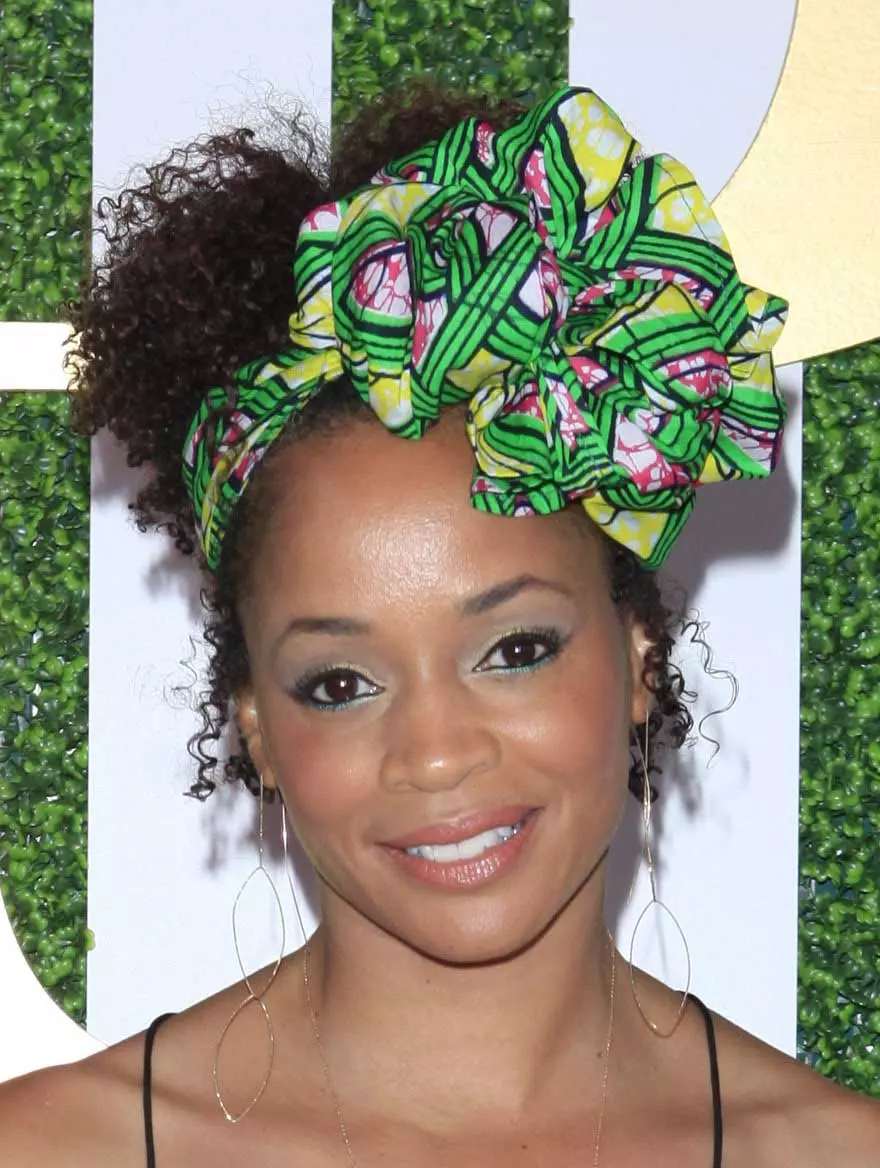
39. Scarf Bow Afro
Latarsha Rose shows us here how to perfectly get away with not washing your hair 3 days in a row. Just tie a colorful scarf around your hair in a really pretty bow to distract everyone from the greasy hair under it. Throw on some clothes in neutral shades to balance out the effect of the colorful scarf and you’re good to go!
What You Need
- Wide toothed comb
- Long cloth scarf
How To Style
- Pull up your curls and fluff them out with the help of a wide toothed comb.
- Wrap your cloth scarf around your afro, making sure that all your hair is gathered into it.
- Tie the scarf into a bow on one side above your forehead.
- Pull out a few curls from above your ears to frame your face and finish off the look.
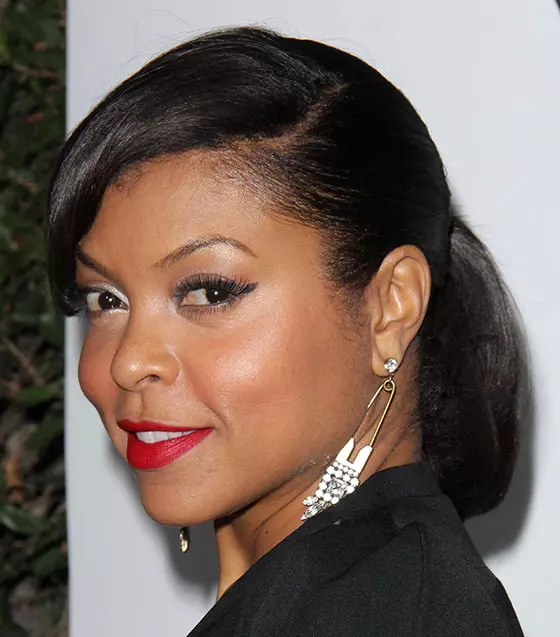
40. Sleek Side Parted Ponytail
Taraji P. Henson kills the fashion game every time she walks down a red carpet. And here you can see her doing it by keeping her whole simple and minimalistic. The sleek side parted ponytail goes perfectly with her plain black outfit. You too can sport this look at work or college to look professional and put-together.
What You Need
- Heat protectant
- Straightening iron
- Fine toothed comb
- Hair elastic
- Smoothening serum
How To Style
- Prep your washed, dried hair with some heat protectant.
- Picking up 1 inch sections of hair at a time, straighten all your hair.
- Part your bangs (or the front section of your hair) on one side.
- Comb all your hair at the back and tie it into a mid level ponytail at the back of your head.
- Rub some smoothening serum between your palms and run them over your hair to give it a sleek finish.
41. French Twisted Tiara
Twist up your hair and look like an absolute princess by fashioning a tiara out of it. And you don’t need any diamonds or rubies to embellish this tiara! All you need are a couple of hair elastics and bobby pins to complete this hairstyle.
What You Need
- Hair brush
- Hair elastics
- Bobby pins
How To Style
- Brush out your hair to remove all knots and tangles.
- Part your hair down the middle.
- Pick up a 2 inch section of hair from right near your parting, on the left side, and split it into 2 sections.
- Twist the left section towards your left and flip it over the right section.
- Keep repeating the previous step while adding more hair into the twisted braid with each subsequent twist.
- Once your twisted braid has reached the back of your head, simply twist it the rest of the way down and secure it with a hair elastic.
- Repeat step 3 to 6 on the right side.
- Place the tails of both your braids flat against your head and pin them down to finish off your look.
42. Gelled Back Curls
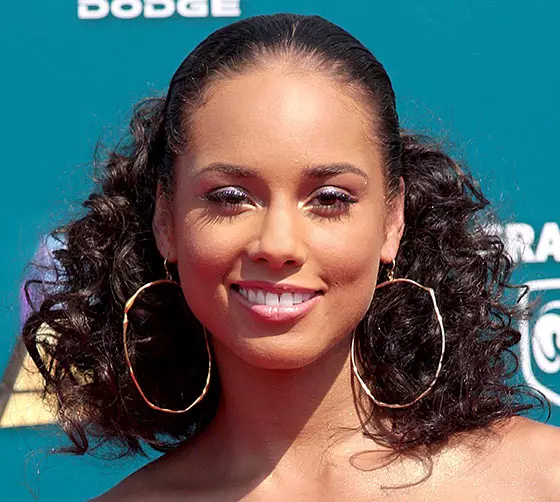
If there’s one thing Alicia Keys is great at, it’s taking the fashion world by storm (I mean, after her singing, of course). Here you can see her create wonder with her hair by gelling back her afro and pinning it down to keep the attention on her gorgeous face but still show off her curls at the back.
What You Need
- Curl cream
- Hair styling gel
- Hair brush
- Bobby pins
How To Style
- Prep your hair with some curl cream to add some bounce and definition to your curls.
- Apply hair styling gel to all the hair at the top of your head.
- Using a hair brush, sleek back all your hair at the top to make them lay perfectly flat against your head.
- Pin down all this flattened hair at the back of your head using lots of bobby pins.
- Shake out your curls with your hands to add some volume and finish off the look.
43. Side Parted Curls
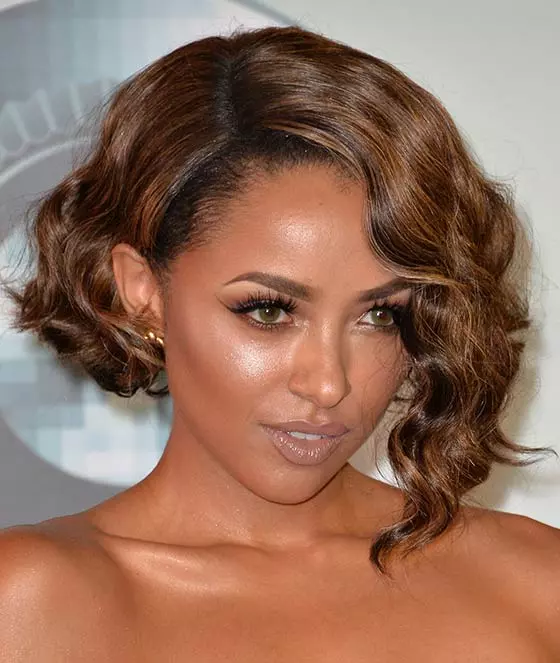
Looking for a more classic look to sport at that office party? Look no further! Kat Graham’s short bob cut styled in perfectly defined and set voluminous curls is best paired with a sparkly off-shoulder gown and a strobe makeup look.
What You Need
- Heat protectant
- 1.5 inch curling iron
- Medium hold hairspray
- Smoothening serum
How To Style
- Apply heat protectant all over your hair.
- Part your hair on one side.
- Picking up 2 inch sections of hair, curl all your hair.
- Each time you curl a section of hair, hold it curled up in your hand for a few seconds after removing the iron.
- Apply a bit of smoothening serum gently onto your curls to give them shine.
- Spritz on hairspray to prevent the curls from drooping or unraveling through the day.
44. Bumped Up Straight Hair
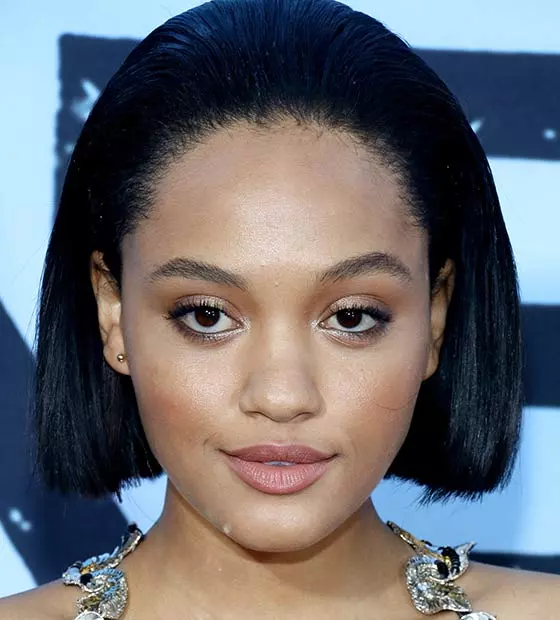
Kiersey Clemons shows us how it’s done with this sleek straight hair look. The perfectly set poker straight hair is edgy and sure to make you look like the coolest person in the room. Like people will seriously be intimidated by the thought of walking up to you because of your bangin’ hair.
What You Need
- Heat protectant
- Straightening iron
- Teasing brush
- Fine toothed comb
- Smoothening serum
- Light hold hairspray
How To Style
- Prep your hair with some heat protectant.
- Picking up 1 inch sections of hair at a time, straighten all your hair until it is poker straight.
- Partially tease down the hair at the crown of your head.
- Use a fine toothed comb to sleek back and smoothen the front section of your hair over the teased down hair.
- Rub some smoothening serum on the hair at the top of your head to remove any frizz.
- Finish off with some light hold hairspray to set the look in place.
45. Messy High Ponytail
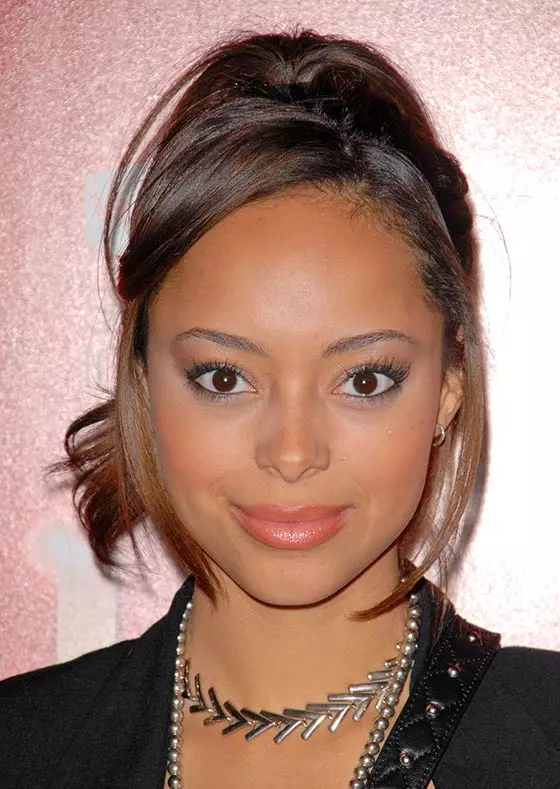
We all love a good high ponytail, don’t we? It’s simple, it’s straightforward, and it gets its job done (of keeping your hair out of your face). But that doesn’t mean you can’t look cute with it. Amber Stevens’ cute and messy high ponytail shows you how you can look adorable in a ponytail without compromising on your style.
What You Need
- Heat protectant
- Straightening iron
- Hair elastic
How To Style
- Apply heat protectant all over your hair.
- Picking up 2 inch sections of hair at a time, straighten all your hair.
- Wrap the ends of your hair around the flat iron to give them some wavy texture.
- Leaving out the front sections of your hair, tie all your hair into a messy high ponytail.
- Part the front sections of your hair on one side to frame your face and finish off the look.
46. Textured Side Ponytail
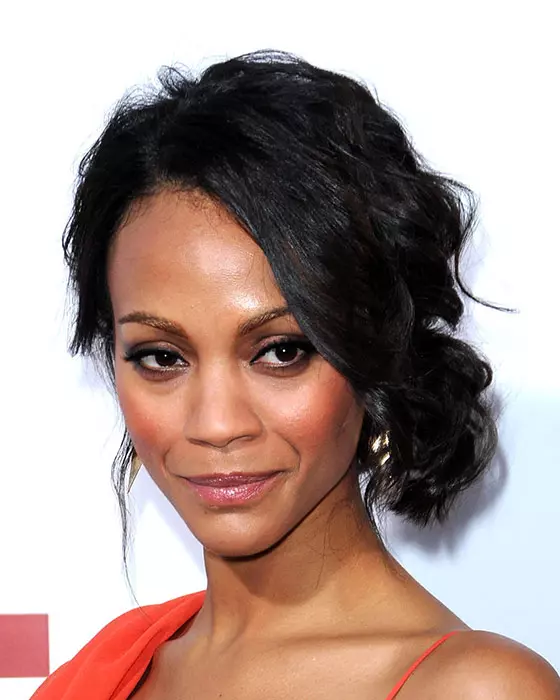
Listen, if Zoe Saldana sports a hair look, you know damn well that it is on top of its style game. This texturized side ponytail, for example, can just easily be worn over a jeans and simple t-shirt as with a fancy gown. Try it out and see for yourself.
What You Need
- Heat protectant
- Straightening iron
- 1.5 inch curling iron
- Hair elastic
How To Style
- Prep your washed, dried hair with some heat protectant.
- Picking up 2 inch sections of hair at a time, straighten all your hair.
- Roughly pick up random sections of hair and curl them to give your hair some texture.
- Part your hair on one side.
- Gather all your hair into a low side ponytail and tie it with a hair elastic.
- Loosen your hair at the top and pull out a few strands of hair to frame your face and finish off the look.
47. Fancy Headbanded Afro
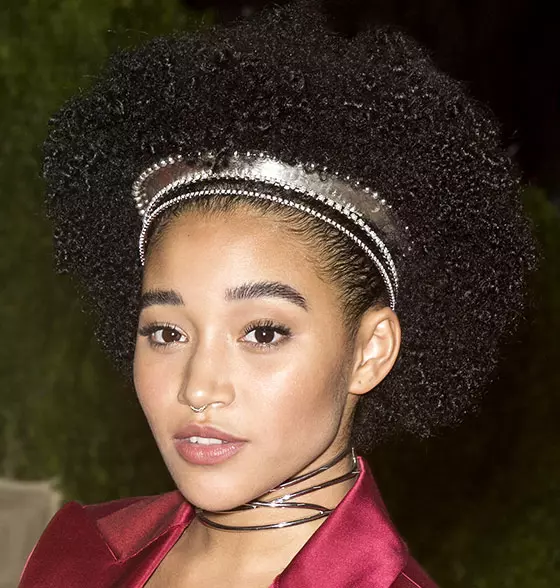
One fancy headband adds some sparkle to your hair. But two headbands transform it into something truly magical. Amandla Sternberg shows us here that with the right hair accessories, you don’t need to fiddle around with your hair too much. Just wear them around your natural hair and you’re done!
What You Need
- Wide toothed comb
- Hair styling gel
- Hair brush
- 2 fancy elasticated headbands
How To Style
- Start out by picking out your curls and adding volume to your afro with a wide toothed comb.
- Apply some styling gel on the hair along your hairline.
- Use a hair brush to sleek down the gelled hair on the edges.
- Place your headbands just above your forehead, making sure that all your hair is gathered under them.
48. French Braided Back
Girl, bring sexy back with this braided afro look that is sure to make you the talk of the town. I mean, why French braid your hair from the front when you can do it from the back? Besides, it will add a more dramatic flair to your exit when you walk away from your haters.
What You Need
- Wide toothed comb
- Jumbo bobby pins
How To Style
- Gather all your hair and flip it to the front of your head.
- Pick up a 2 inch section of your hair from the nape of your neck and split into 3 sections.
- Start French braiding that section of hair up your head by adding more hair into the braid from the sides, with each subsequent stitch of the braid.
- Once your French braid has reached the crown of your head, secure it with the help of bobby pins.
- Pick up the hair from your sides and pin them down next to where you pinned down your braid.
- Use a wide toothed comb to pick out your curls and finish off the look.
49. Side Bangs Ponytail
Don’t we all love those lazy days where you just spend the day in your pajamas, curled up on the couch, watching movies? Well, here’s a style tailor-made for those days. Just a simple ponytail and some hair left out to frame your face and maintain your cuteness levels.
What You Need
- Hair brush
- Hair elastic
How To Style
- Leaving out the hair from one side and the top of your head, brush back the hair from the other side and the back of your head.
- Gather all that hair into a ponytail and tie it at the back of your head.
- Fluff out the curls at the front with your hand and sweep them over to one side to finish off the look.
50. The Wide Brimmed Hat Look
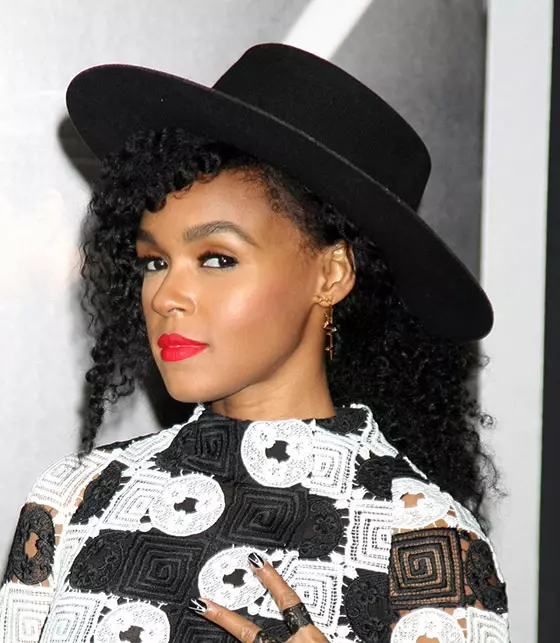
When it comes to those pesky bad hair days, Janelle Monae has the best solution for them. A hat! Throw your hair into a low ponytail, leave out some hair to frame your face (and give off a subtle Michael Jackson vibe), and you’ll be having the best hair day ever. The best part is that a hat works well with hair of all lengths (like Monae’s mid-length tresses pictured above) but it is best suited for short hair.
What You Need
- Curl cream
- Hair elastic
- Wide brimmed hat
How To Style
- Start out by applying curl cream all over your hair to give more definition to your natural curls.
- Part your hair on one side.
- Leaving out the front section of your hair to frame your face, tie all your hair into a low ponytail at the back.
- Put on your wide brimmed hat to finish off the look.
51. Bowl Cut
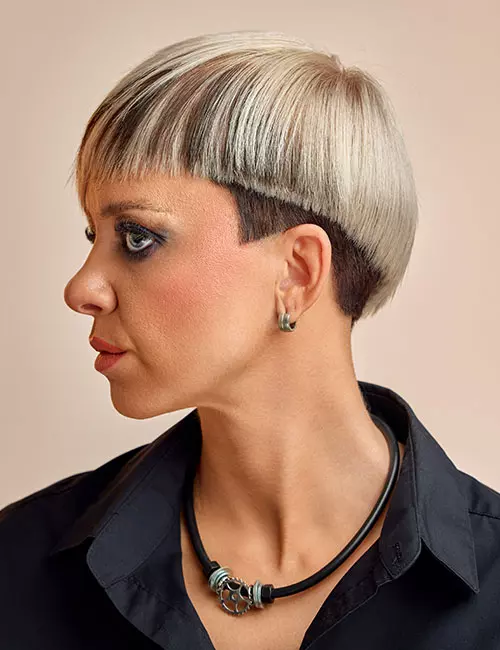
The mushroom-shaped bowl hairstyle is an 80s-inspired haircut characterized by blunt fringes with an undercut or tapered lower portion. Bowl cut is high maintenance but will give a unique, edgy look. It is a safe choice for a DIY haircut.
What You Need
- Smoothing balm/Hair-cutting lotion
- Rat tail comb
- Scissors
- Hair clips
How to Style
- Start by applying the hair balm to smooth the hair.
- Divide the hair into 4 sections: a vertical central parting and a horizontal one at the back of the head.
- Using a rat tail comb, separate a quarter of an inch above the ear from end to end. Twist and clip the upper portion.
- Establish the length at the nape and crop or undercut as required.
- Start cutting the bowl shape from the front and maintain even length.
Infographic: 6 Best Short Hairstyles For Black Women
Who said short hair has to be boring? Short hair is versatile and easy to style and manage. Whether you have to attend an official event or head out to a party, there are plenty of hairstyle options to choose from. In the infographic below, we have listed the top 6 hairstyles for black women with short hair. Check them out.

Illustration: StyleCraze Design Team
Short hairstyles for Black women are extremely fashionable and go well with both casual and formal looks. There are limitless styling options for short hair. The listed hairstyles for black women are cute and add volume and texture to the hair. In addition, these short hairstyles provide manageability and an elegant look. Piled-up pony, Fro-hawk, the S bun, twisted comb Afro, and pin-up bun are some popular short hairstyles you can choose from. We hope a few of the 40 gorgeous short hairstyles listed above caught your eye and inspired you to try them out.
Frequently Asked Questions
How do I choose the right short hairstyle for my face shape?
Your face shape determines which short hairstyle suits you. So determine your face shape as the initial step. In general, these are some styles you can try out:
• Oval face shape: Angular bob
• Heart face shape: Pixie cut
• Square face shaped: Shoulder-length lob
• Round face shaped: Short layered bob
What are some low-maintenance short hairstyles for Black women?
A long bob and a buzz cut are some chic low-maintenance short hairstyles for Black women.
Are there any particular hair textures that work best for short hairstyles on black women?
Yes, there are specific hair textures that work very well with short hairstyles for black women. Thin and wispy hair, short curls, and natural hair are great options.
How can I style my short hair to achieve a different look each day?
There are countless ways to style short hair for a fresh look daily! You can try hair extensions to give yourself different hair lengths to try new hairstyles everyday. Colored hair extensions also let you experiment with new hair colors. If you already have a protective hairstyle like cornrows, try different hairdos like ponytails, updos, and half-updos. Add some flair with twists, loops, or accessories such as hairpins or scarves.
What products do I need to maintain my short hair and keep it healthy?
Use a good quality shampoo, conditioner, and argan oil-based styling products to maintain healthy short hair. Pick products that cater to your hair type and answer your hair needs. Conditioning daily is crucial, but ensure you avoid product overload. Use a custom blend of ingredients like argan oil, to enhance shine, with mint essential oil, to ensure your hair is fresh. Invest in a guaranteed silk pillowcase that retains moisture and a bespoke satin bonnet.
Can I add color to my short hair, and if so, what colors work best for black women?
Yes, you can add color to your short hair! For black women, popular hair color options include platinum blonde, pink, burgundy, chestnut brown, Sahara yellow, cobalt blue, honey brown, red, and ombre. It’s best to consult a hairstylist to determine the best color options for your hair type and skin tone.
How often should I trim my short hair to keep it looking its best?
Trim your short hair every six to eight weeks to maintain healthy hair without damage or breakage. The trimming frequency can vary depending on your hair type and style, so consult a hairstylist to determine the ideal schedule for your specific hair.
What are some tips for styling short hair for a special occasion or event?
Consider the event’s dress code and theme before styling your hair. Work with your hair’s natural texture and try popular styles like bobs, curls, waves, and teeny weeny afros. Add accessories like hairpins, headbands, or flowers for an enhanced look.
How can I make my short hair look fuller and thicker?
For thicker and fuller short hair, try a shorter cut such as a bob or pixie, use castor oil or B vitamins for hair growth, opt for hairstyles with layers, asymmetry, or curls, and consider a low fade or twist-out for a tiny weeny afro.
Are there any specific tools or techniques that are particularly helpful for styling short hair on black women?
Use a wide-tooth comb for detangling hair and a silk scarf to lay down your edges. Hair extensions and wigs allow you to play around with different hairstyles, hair lengths, and colors. Consult a stylist to determine the best techniques for your specific hair type and style.
Key Takeaways
- Short kinky hair is easy to wash, style, and maintain.
- You can try pin-up buns, twisted cornrows, or try the quirky front ponytail to style your hair.
- All you need are bobby pins, hairbrushes, gel, and elastics to style your curls.
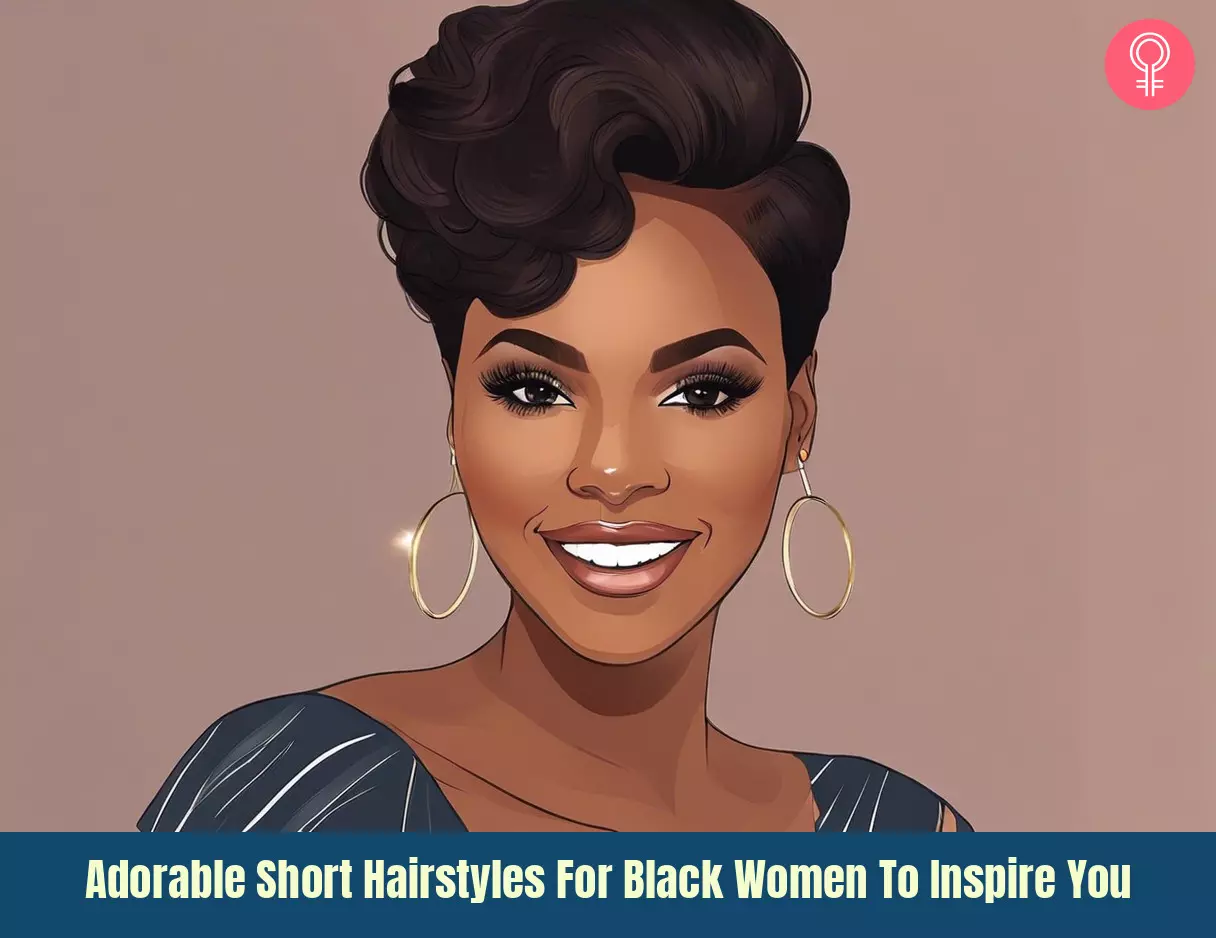
Image: Stable Diffusion/StyleCraze Design Team
Check out this video for the hottest and trending bob hairstyles for black women! Get inspired with these sassy short haircut ideas, and pick the one that goes with your vibe!
Personal Experience: Source
StyleCraze's articles are interwoven with authentic personal narratives that provide depth and resonance to our content. Below are the sources of the personal accounts referenced in this article.
i. We need to stop talking about “Black Hair” for realhttps://medium.com/illumination/we-need-to-stop-talking-about-black-hair-for-real-d53fc9368b52
Read full bio of Starr Mason
Read full bio of Shatabdi Bhattacharya
Read full bio of Shreya Mukherjee


